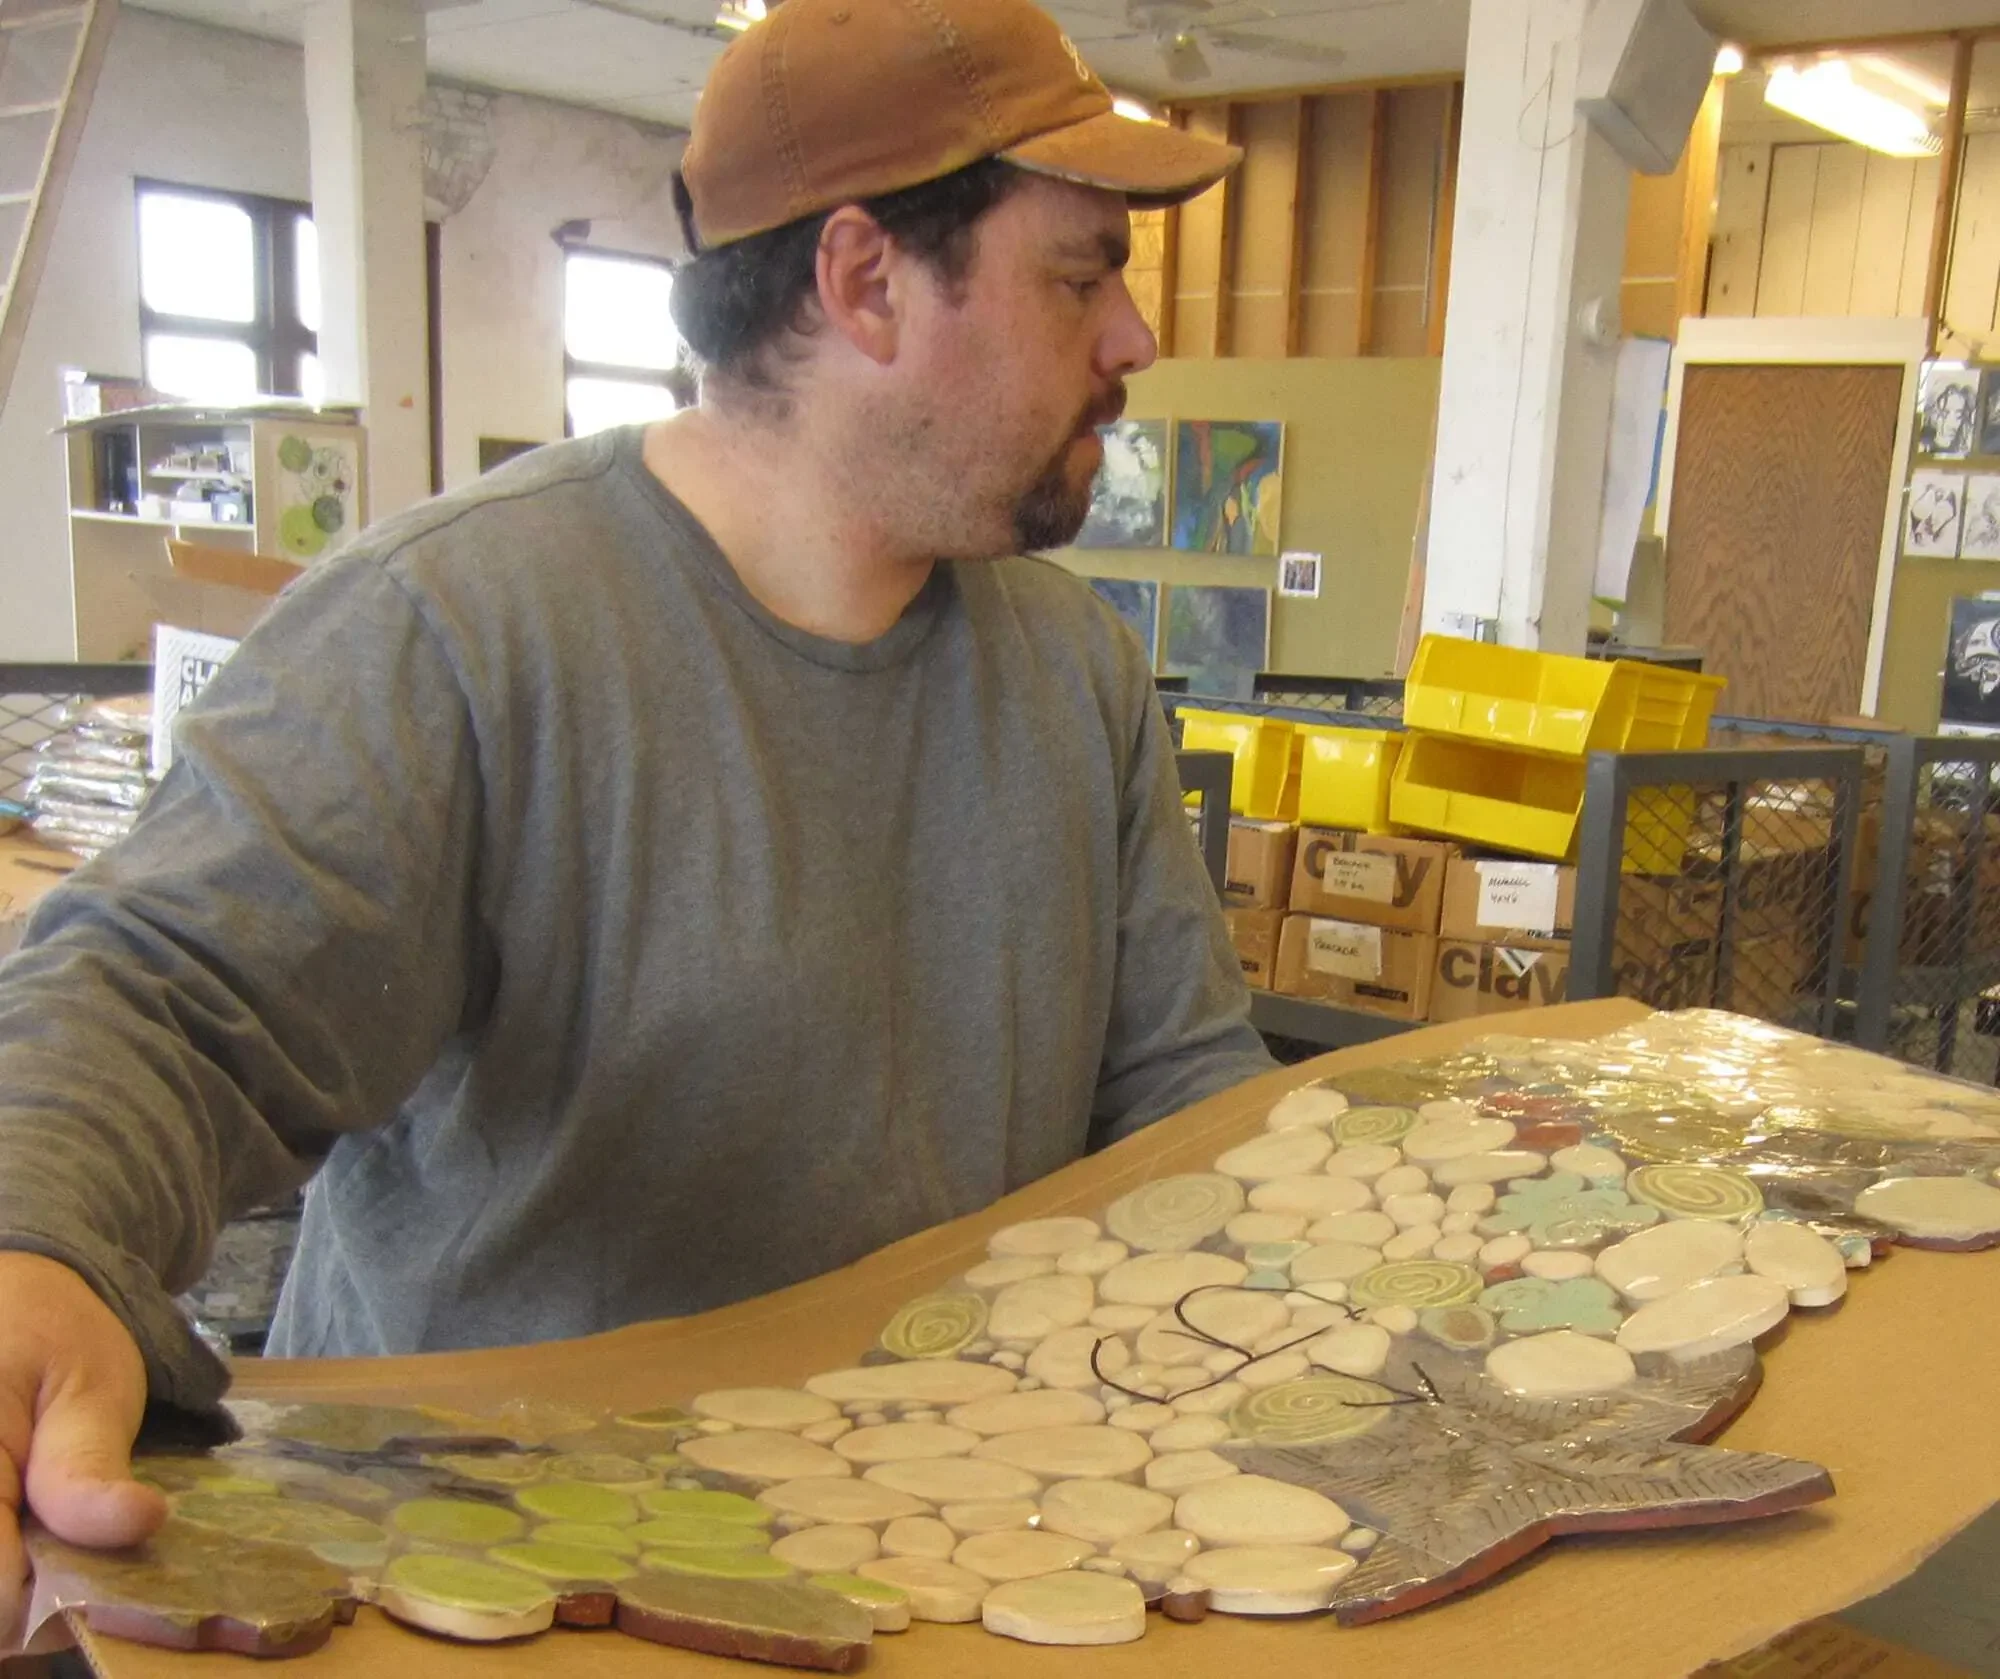
A few months ago, my wife Olga was commissioned to make a mural for a custom home on Whidbey Island, and, since I’m the resident tile installer, I was lucky enough to be asked to install it. I thought I could share a little bit about the process here for you. If you have any questions, please feel free to leave a comment below!
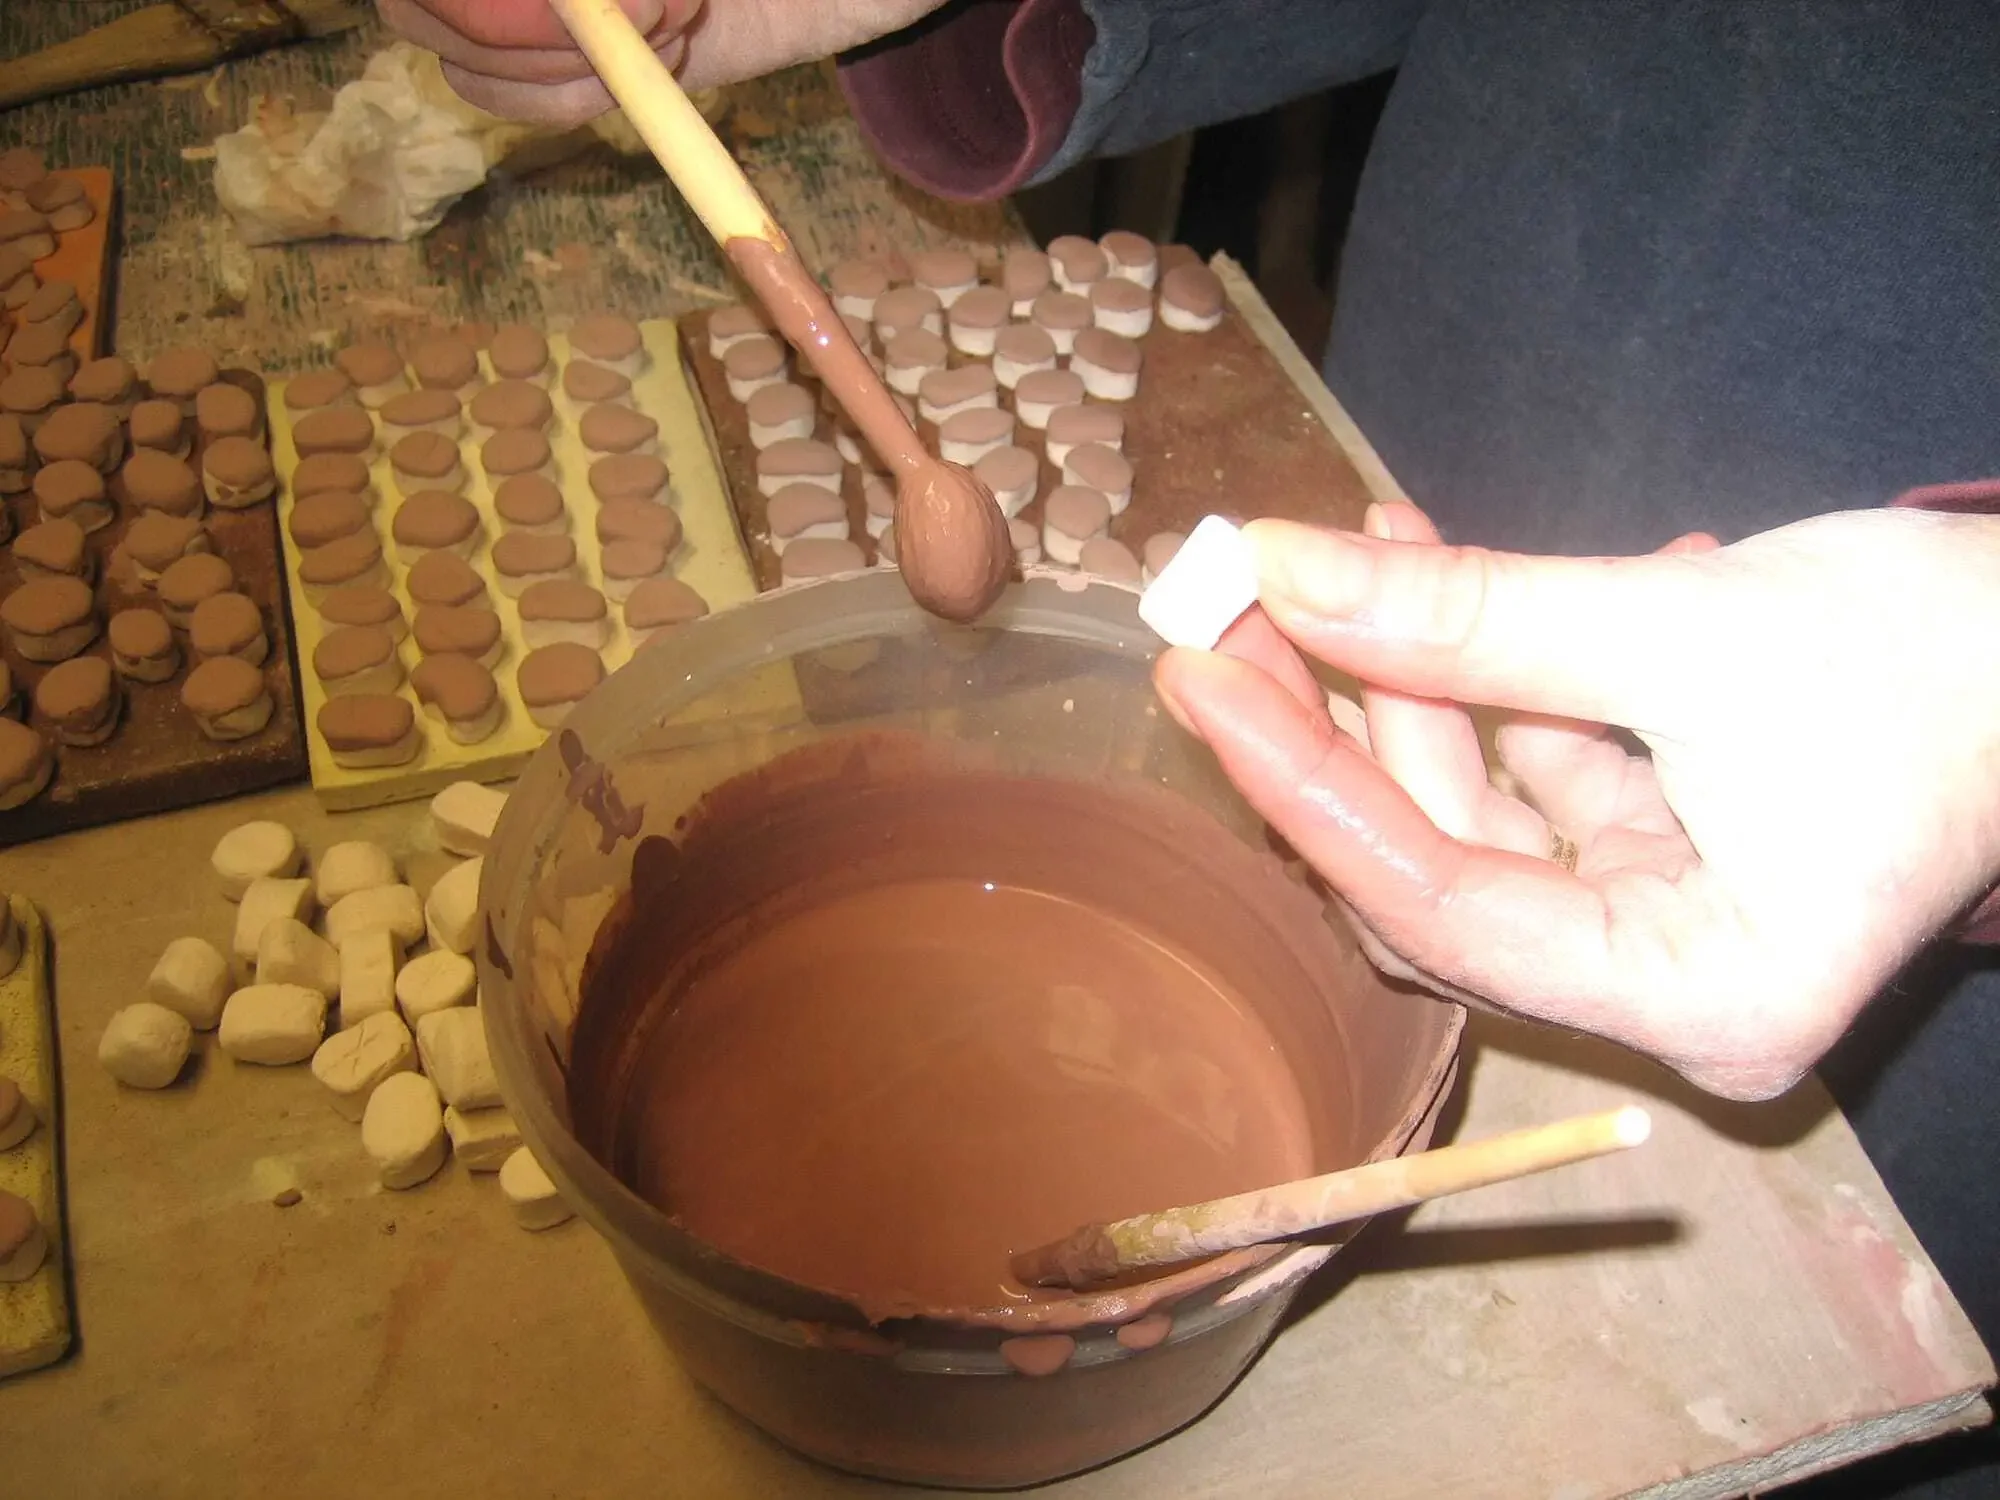
The amount of work that goes in to the making of these murals is kind of staggering to me. First, each and every piece is cut and shaped from raw clay, allowed to dry, fired once in a kiln to the “bisque” stage at 1900+ degrees Fahrenheit, then the glaze is applied by hand to each individual piece, and then back into the kiln for the final firing at 2200+ degrees. If she’s lucky, that’s it and the pieces are ready to use in the mural, but this is a very organic art form, and nothing ever comes out quite the same twice, so very often there’s some sort of fixing that needs to be done, and usually that means they go back in to the kiln a 3rd time or sometimes into the garbage and it starts all over.
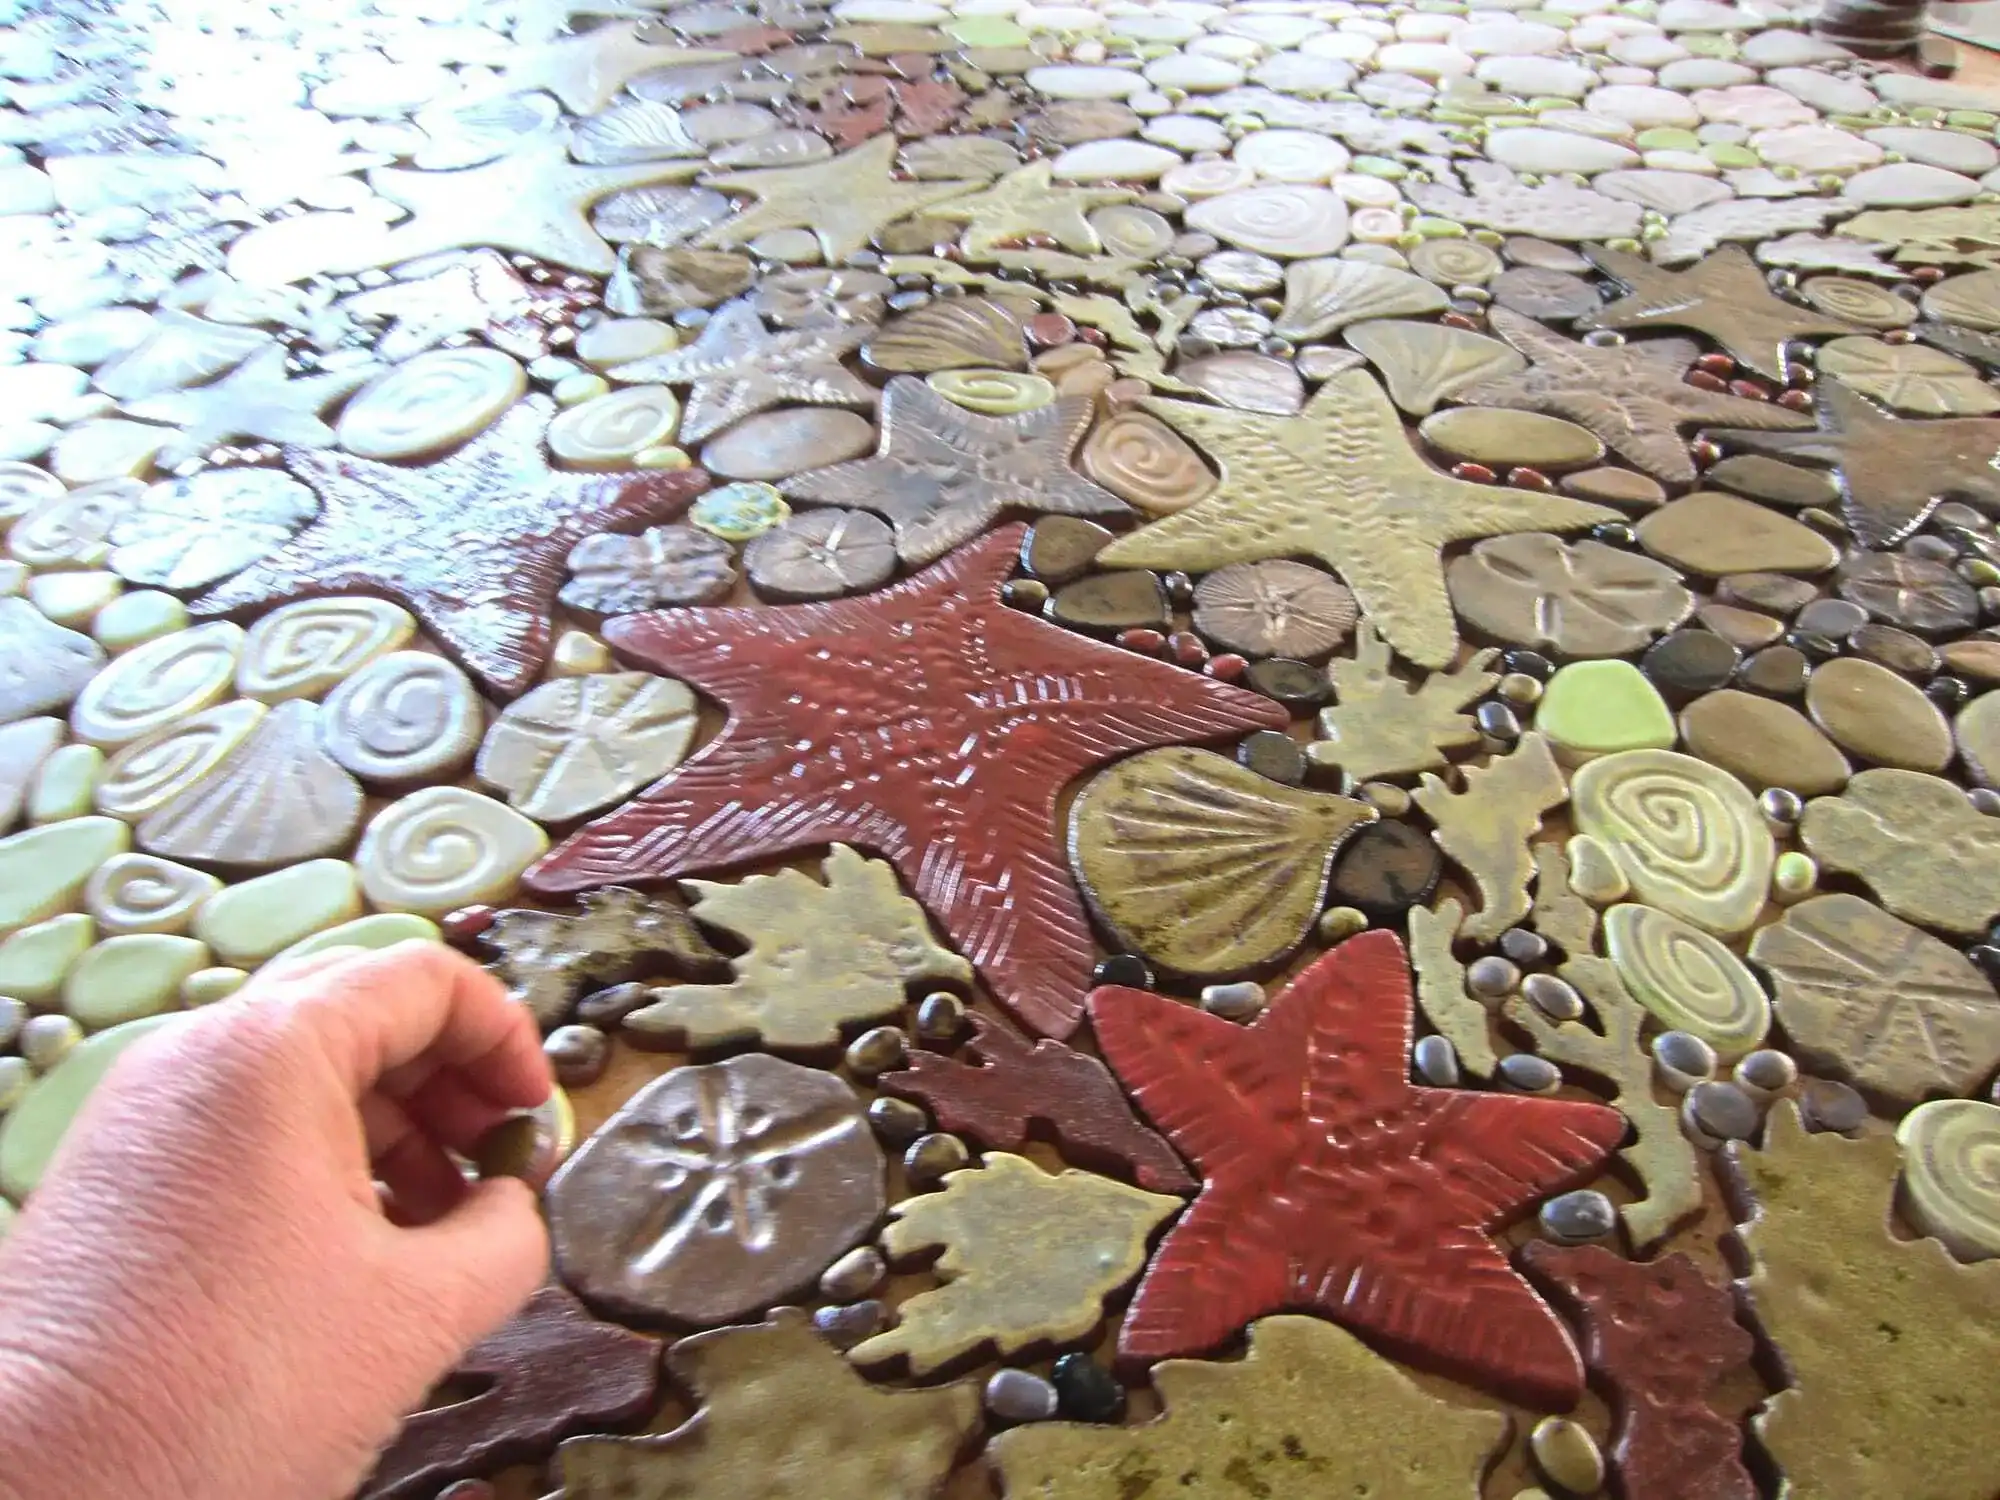
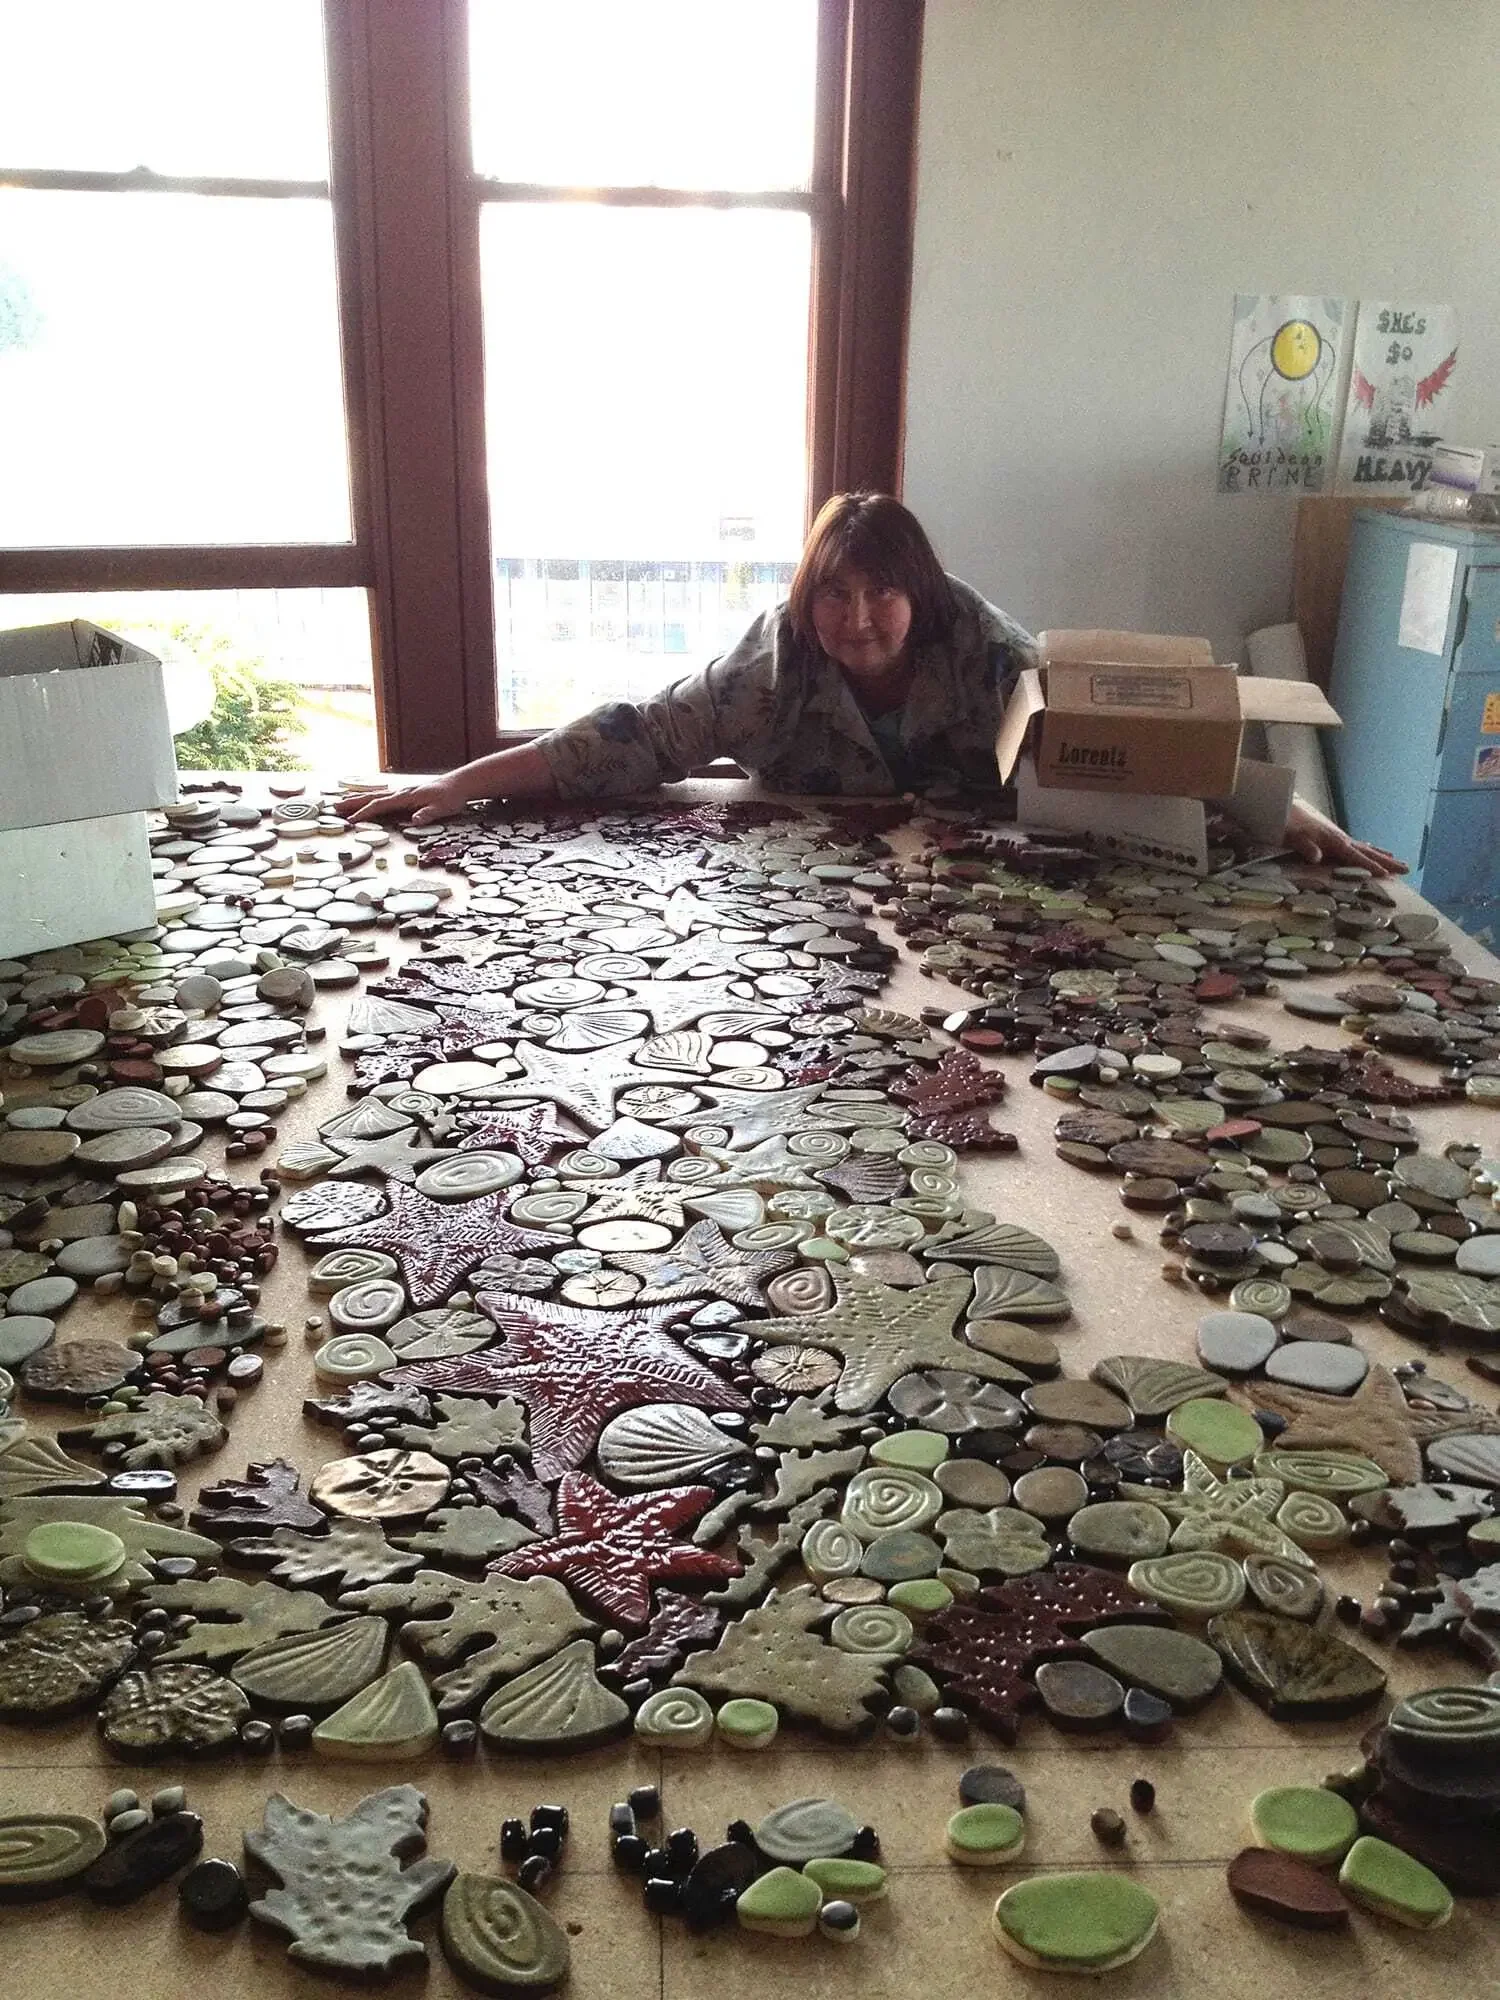
Once the pieces are made, then they are ready to be assembled and arranged into the mural. This is also a time consuming process similar to assembling a giant jigsaw puzzle. Only there’s no picture on the box to guide you, only a rough idea in the artist’s head. I’ve seen Olga spend days creating a mural, only to pull it all apart and start over because she wasn’t happy with the way it flowed or the balance of color. And since these murals don’t have a preconceived design, it means there needs to be a surplus of pieces to pick and choose from. So really for any one mural, there’s probably twice the number of individual pieces that need to be made.

Once the mural is assembled, it’s taped up with special adhesive plastic, labeled, and cut into manageable sections. Then it’s off to the customer’s home for installation.
Now it’s off to beautiful Whidbey Island, to be installed in the customer’s newly built custom home.

The mural was commissioned for the floor of the Powder Room. Since the floor is concrete, we installed a membrane first to ensure that if any cracks formed in the concrete (which is pretty common) they wouldn’t affect the tile. There are many different types of membrane available for this, but we like to use Kerdi Ditra brand.
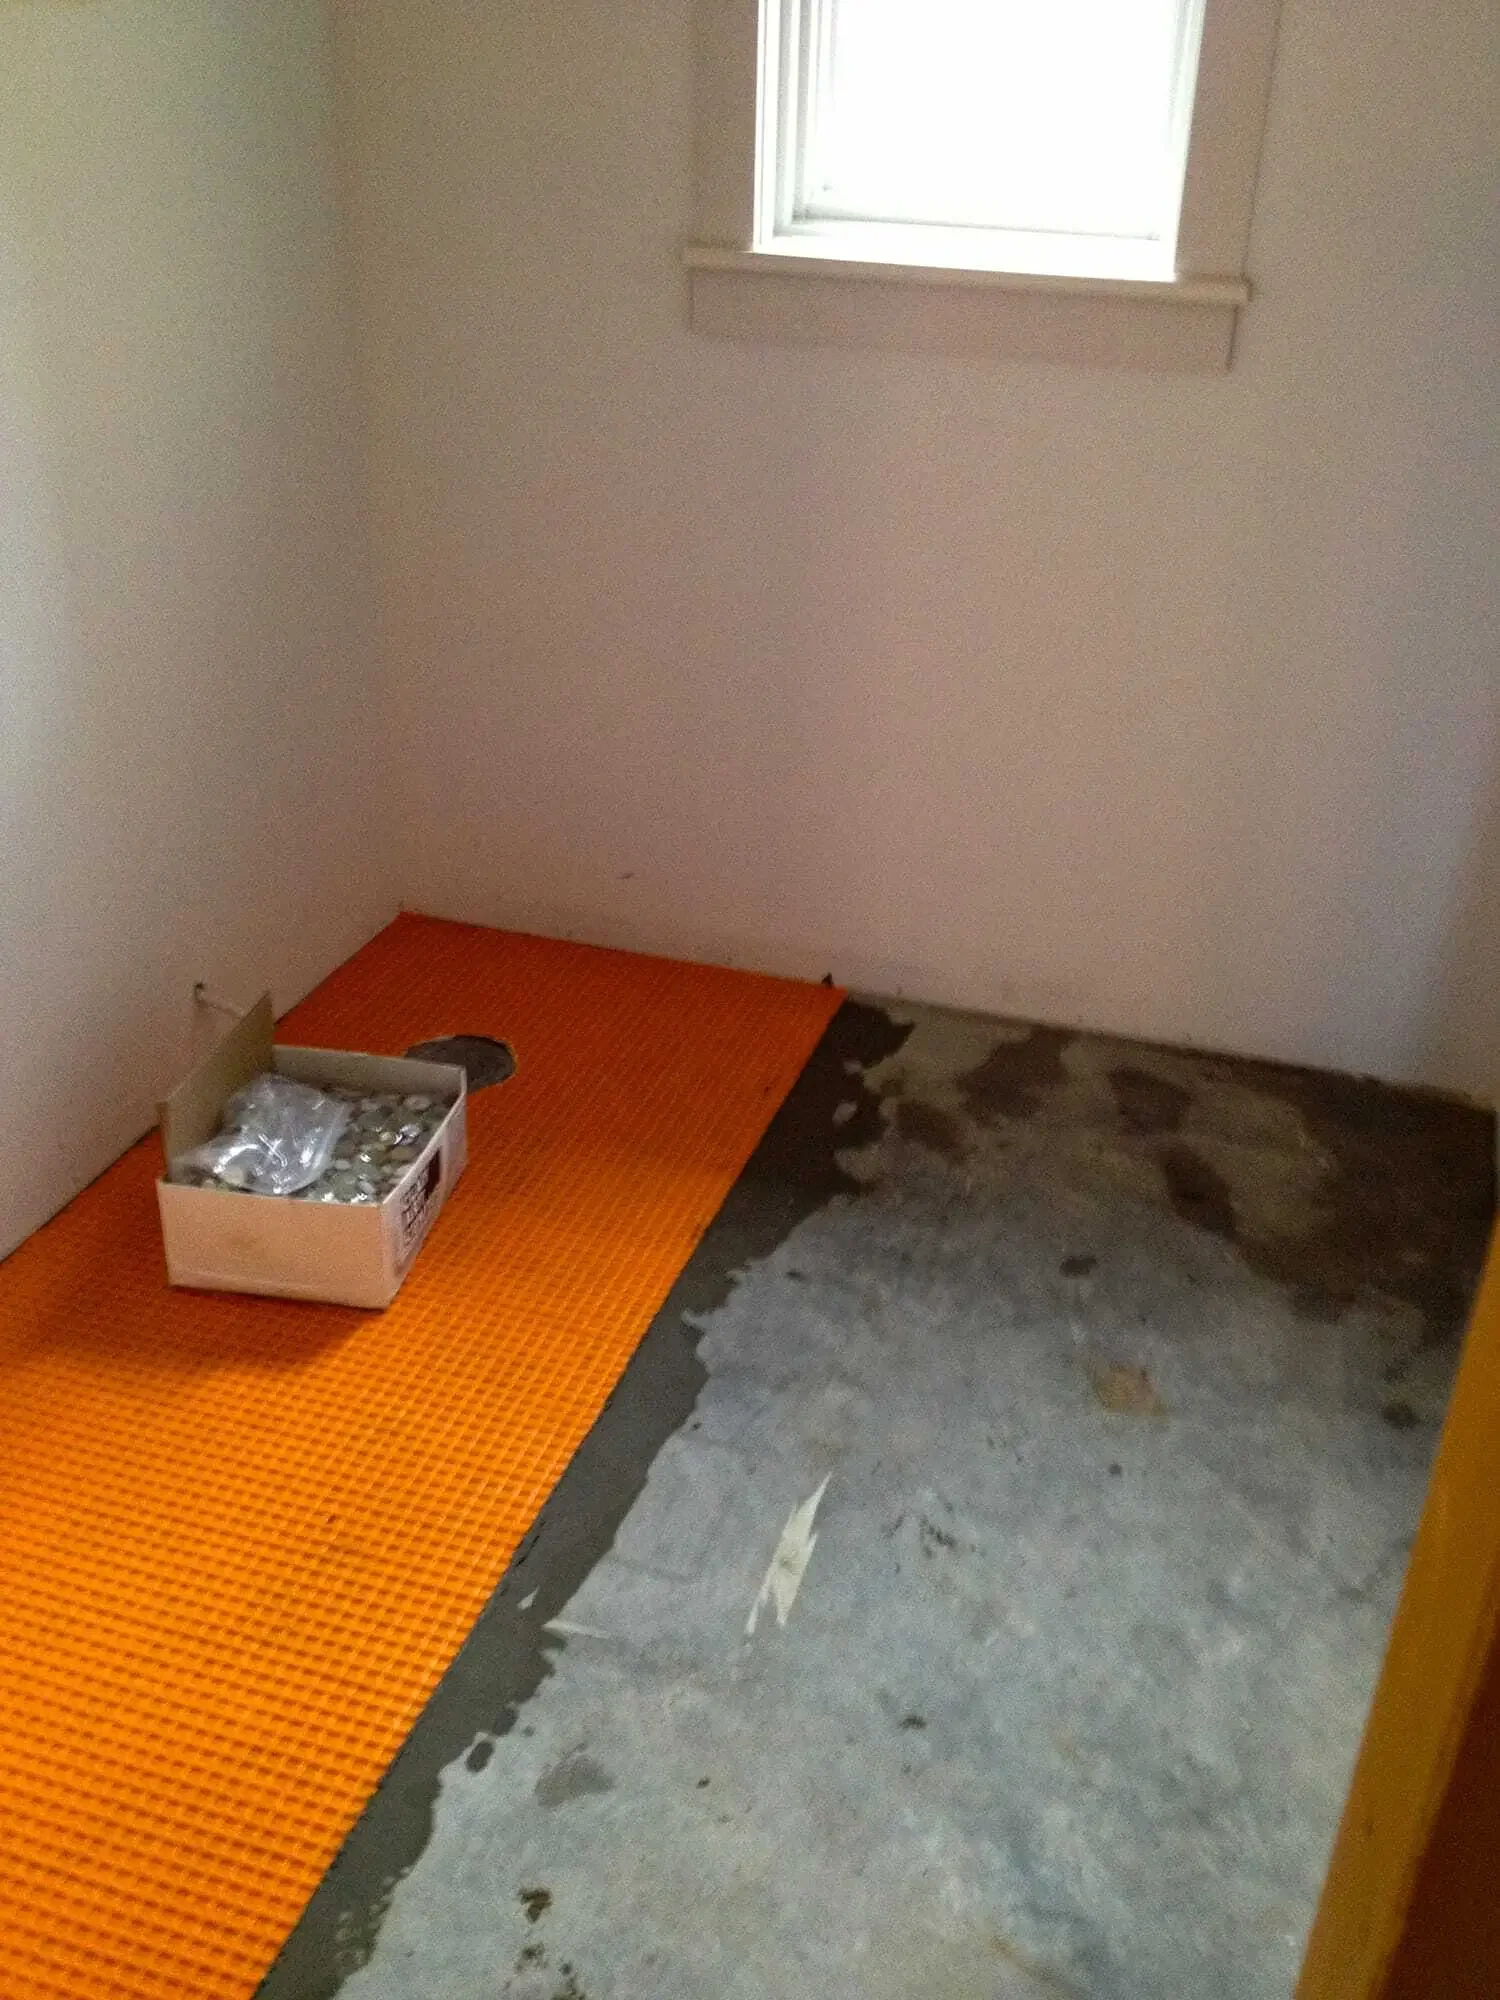
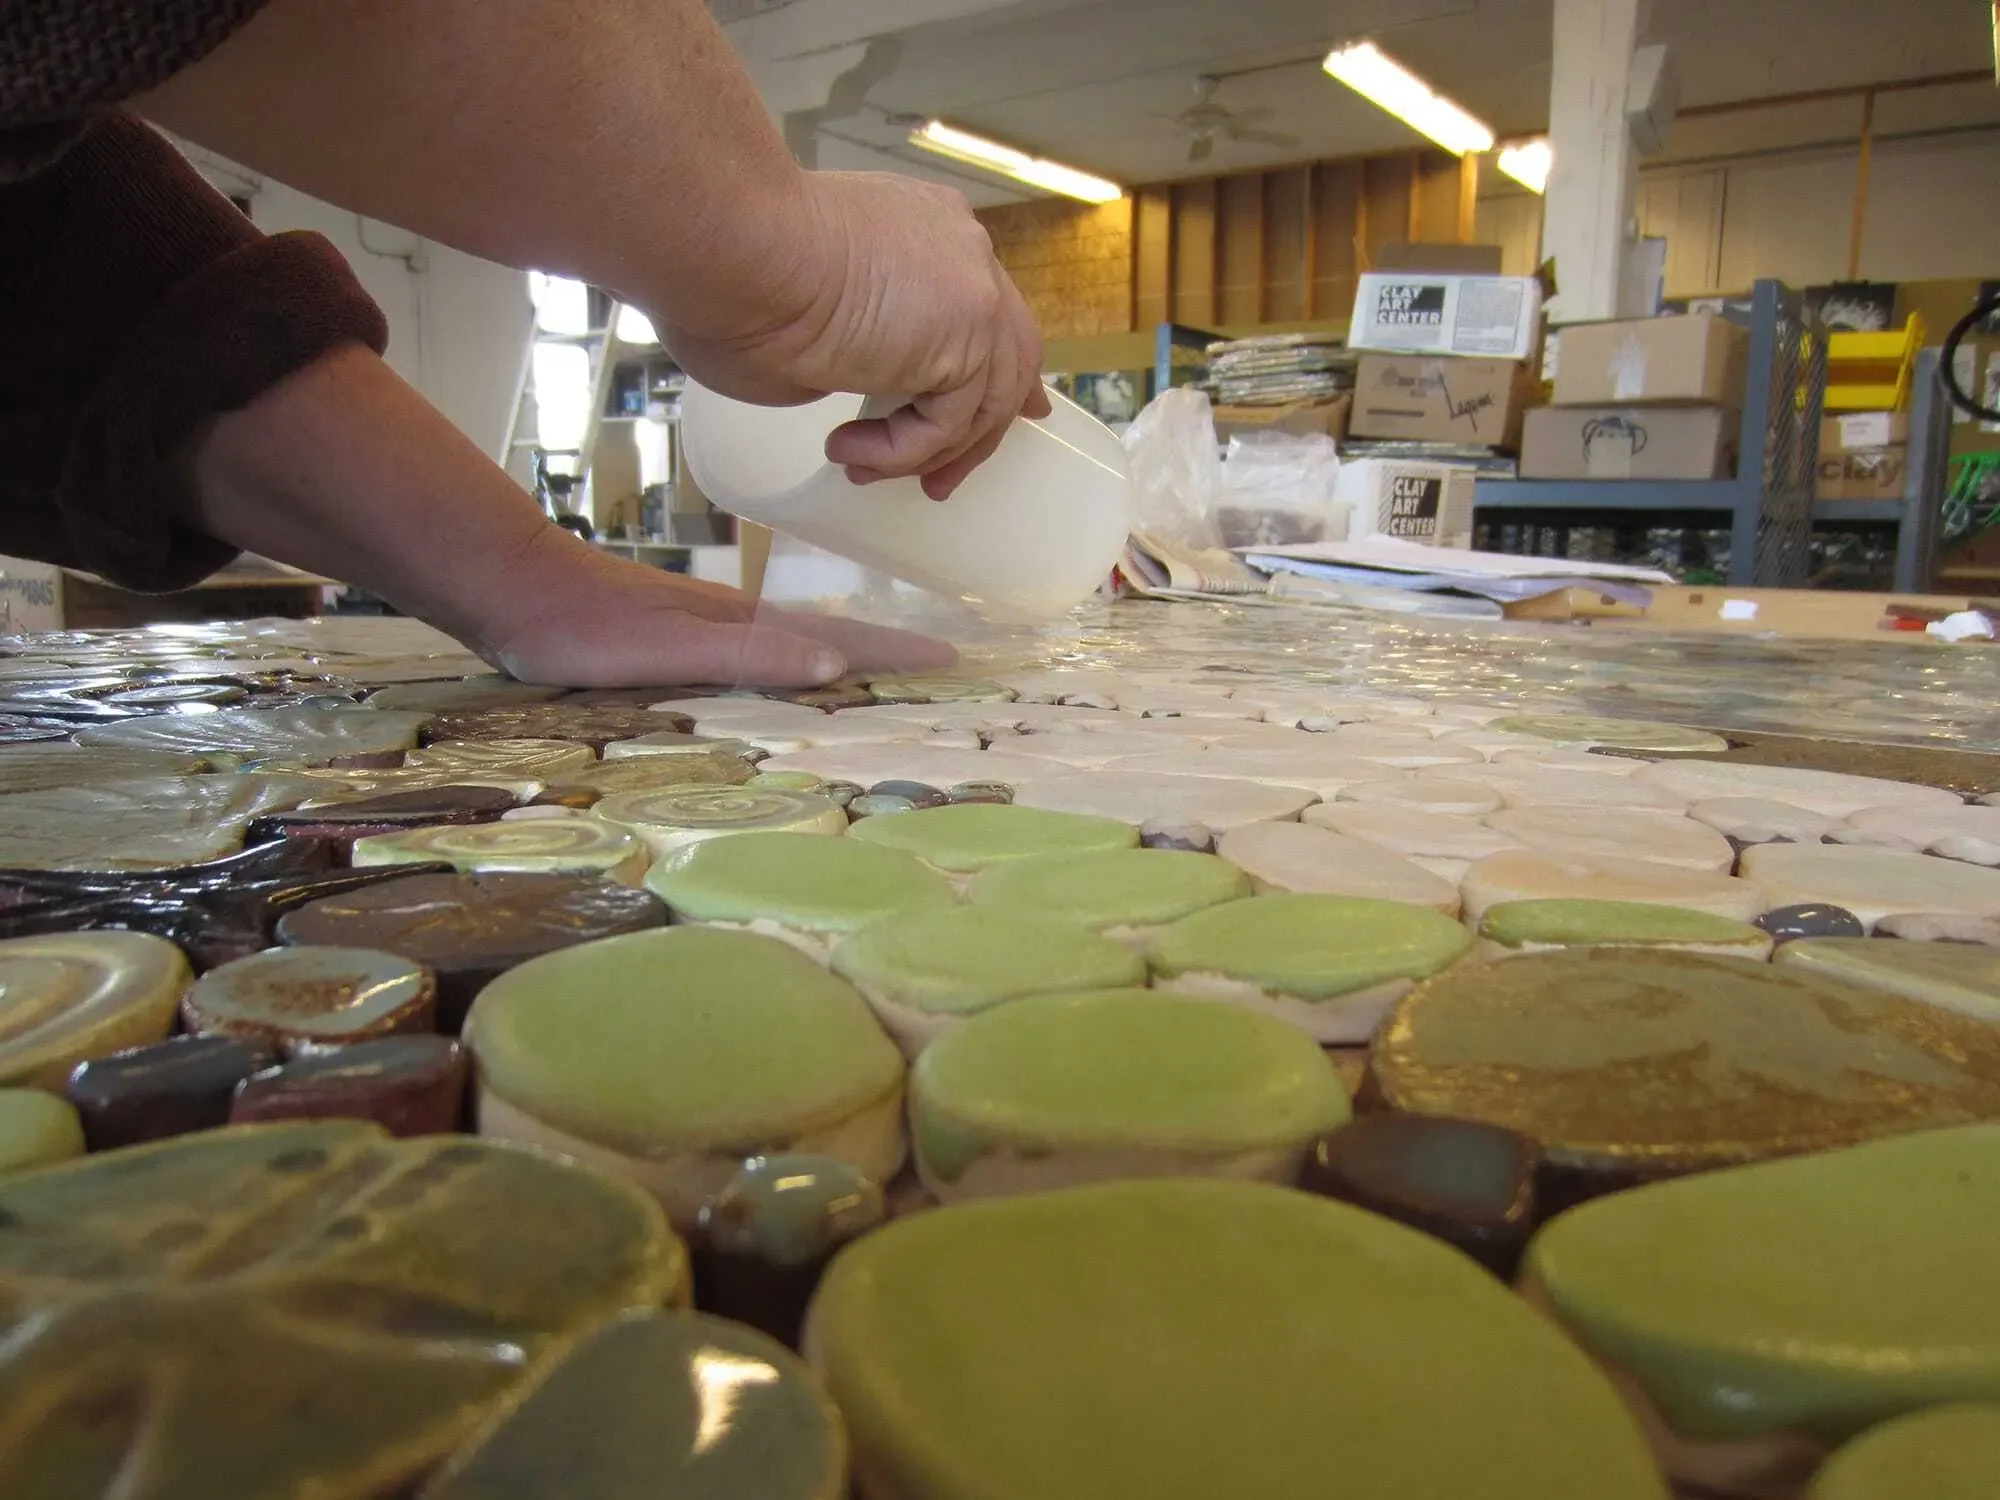
Once the membrane is down, it’s time to start installing the tiles. The mural is cut up into labeled sections, so it’s just a matter of matching up the labels and fitting the sections together.
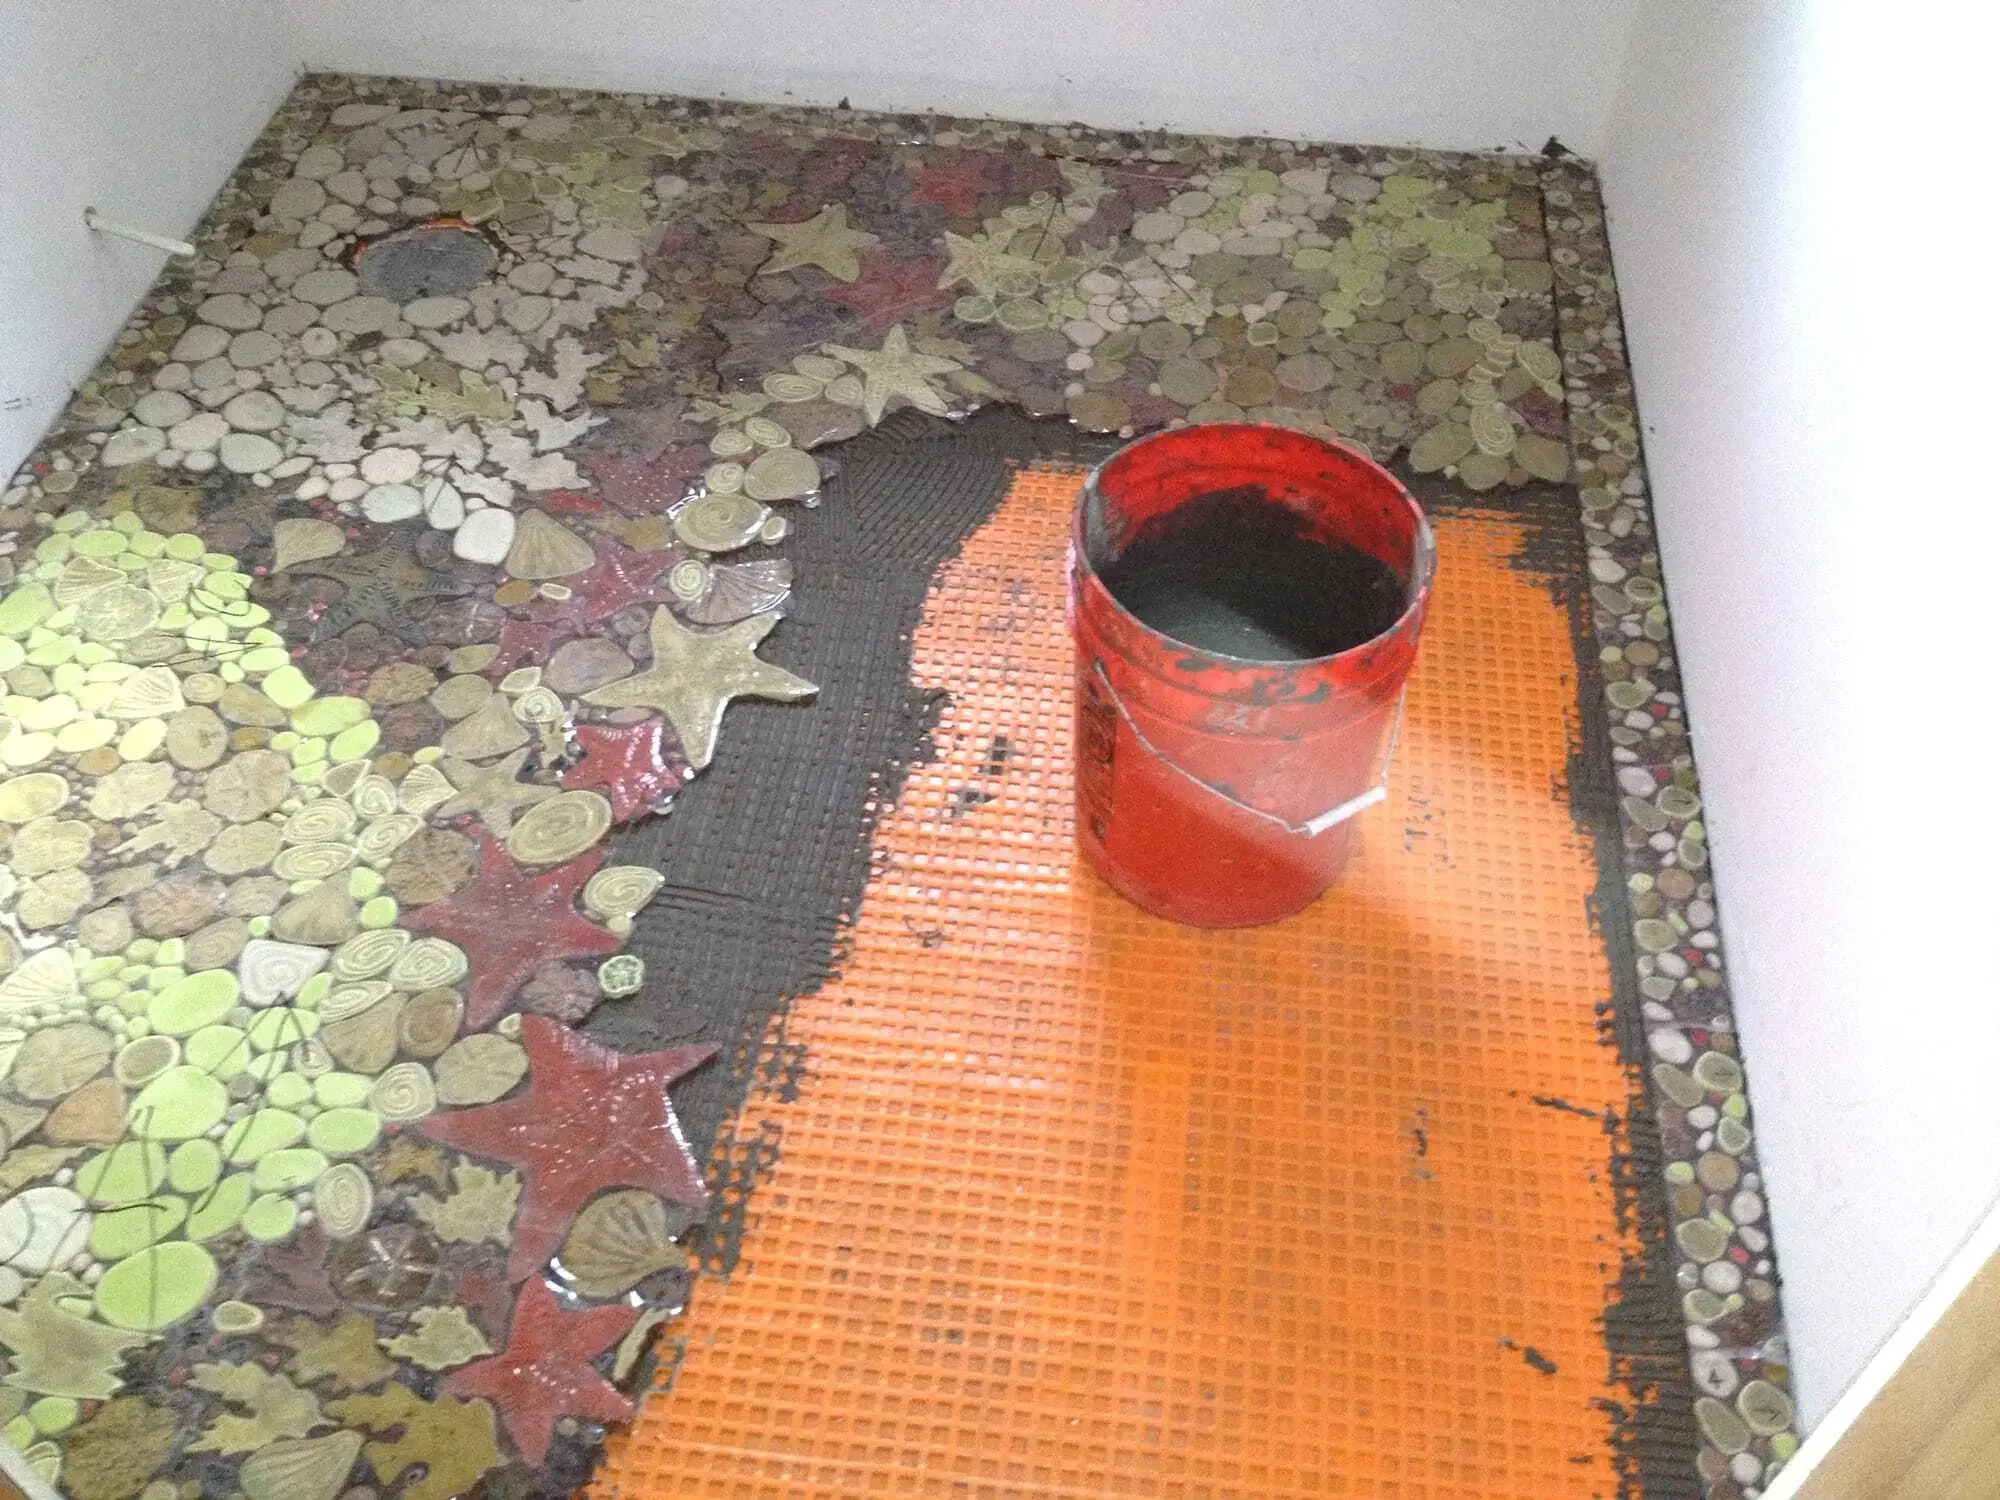
Once installed, and set-up, we can peel off the tape and install the grout. I love this part, because this is where we can really start to see what we’ve been working for.
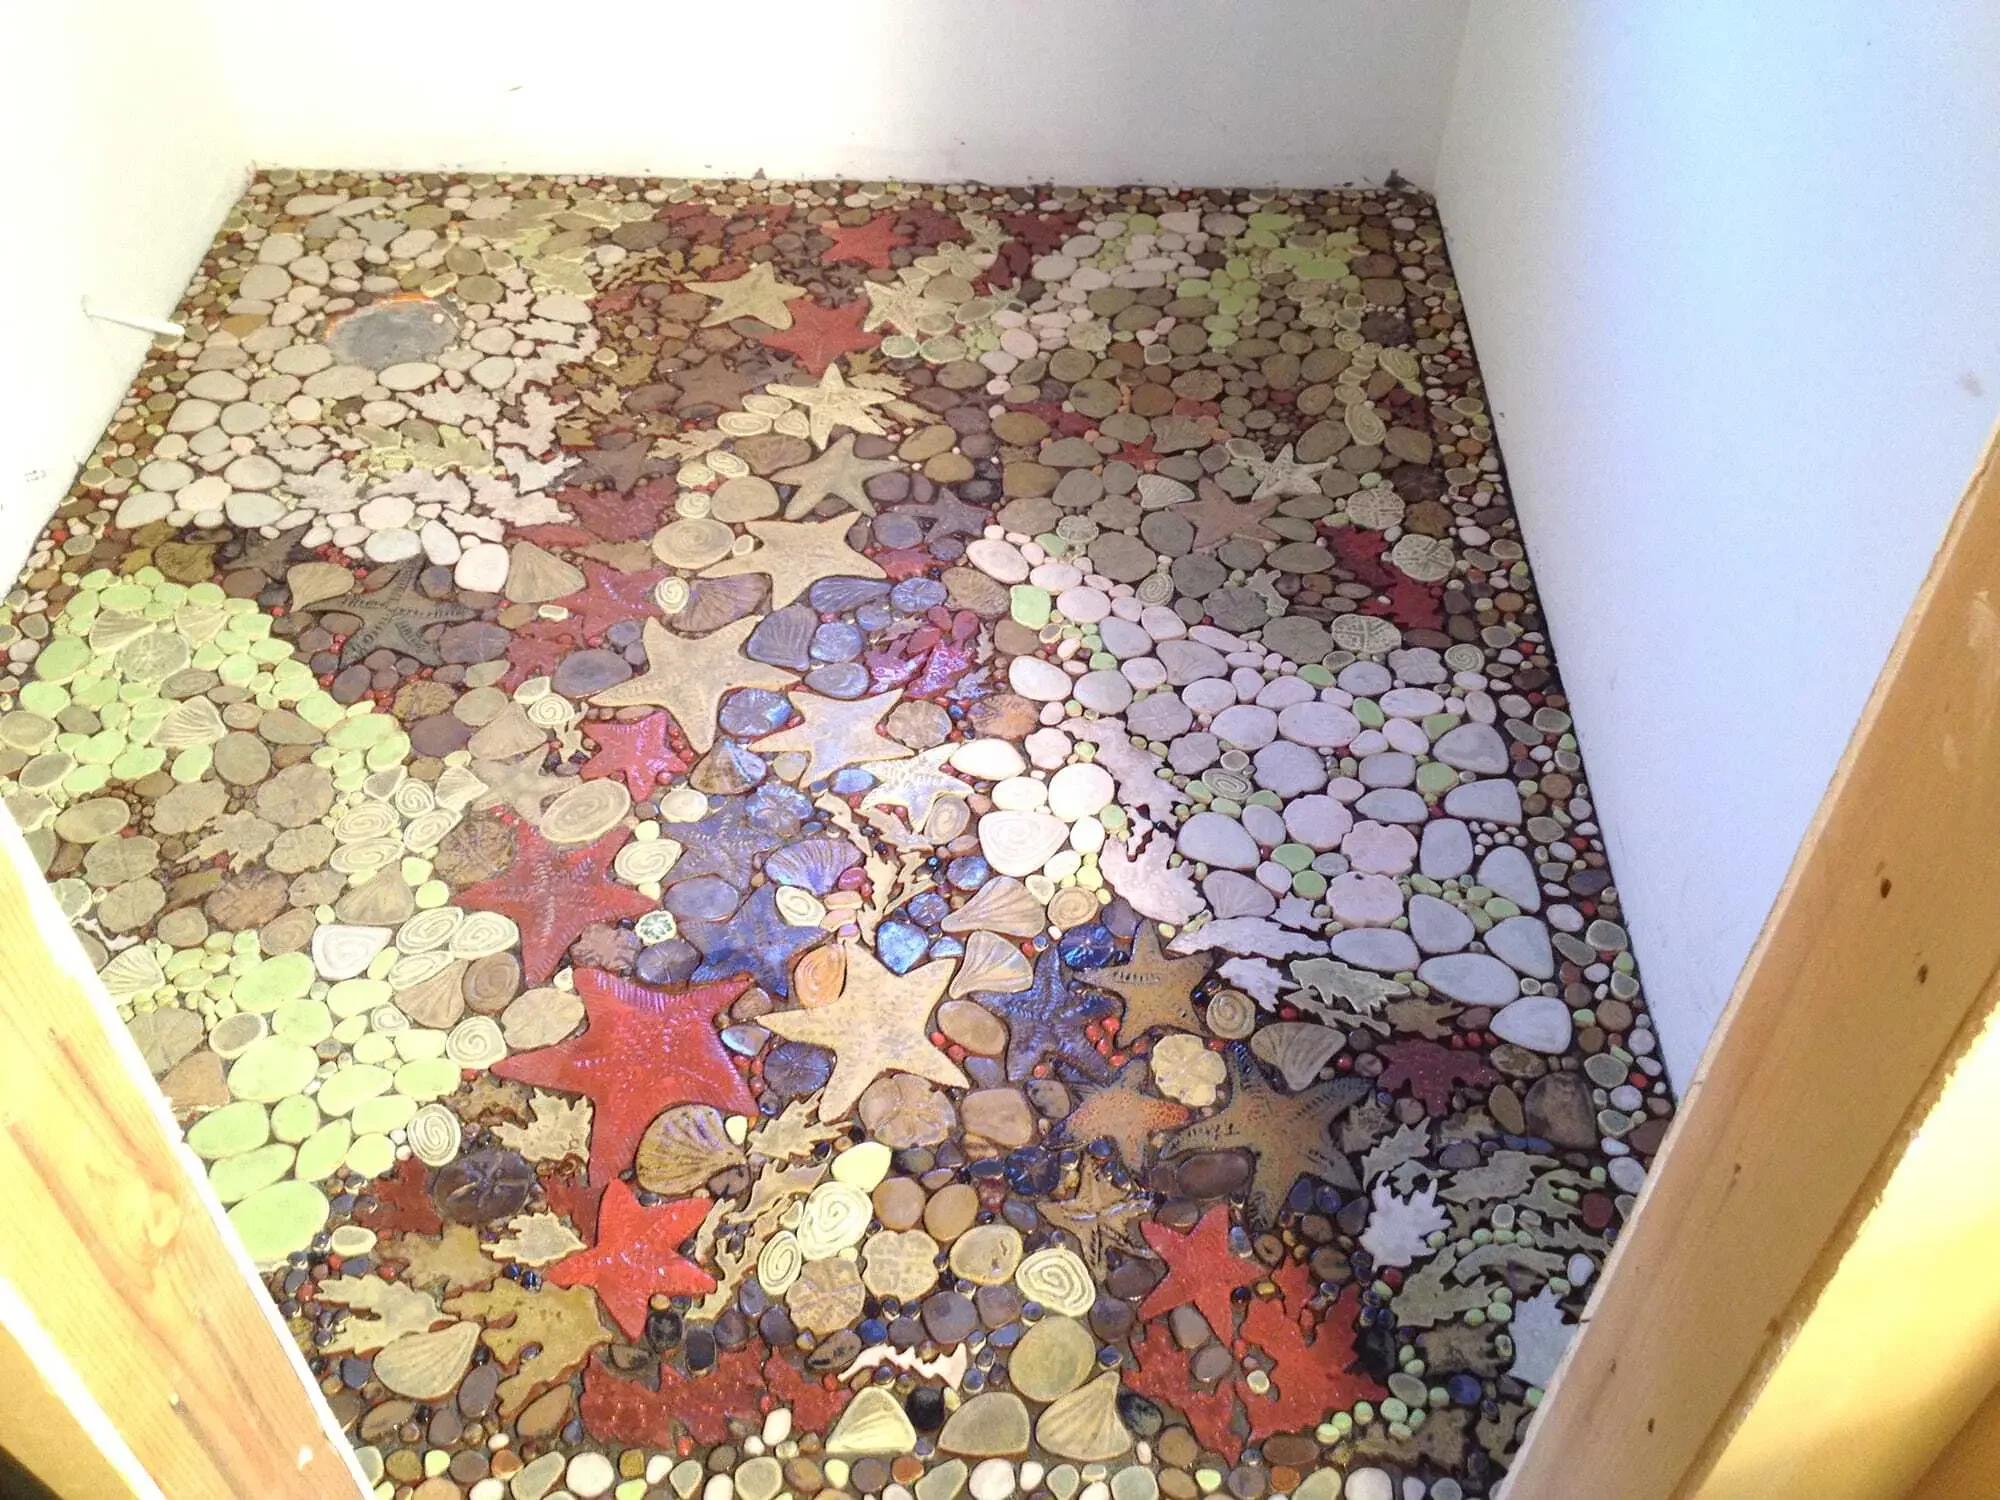
Once the grout is installed, we can finally step back and admire this incredible work of art!
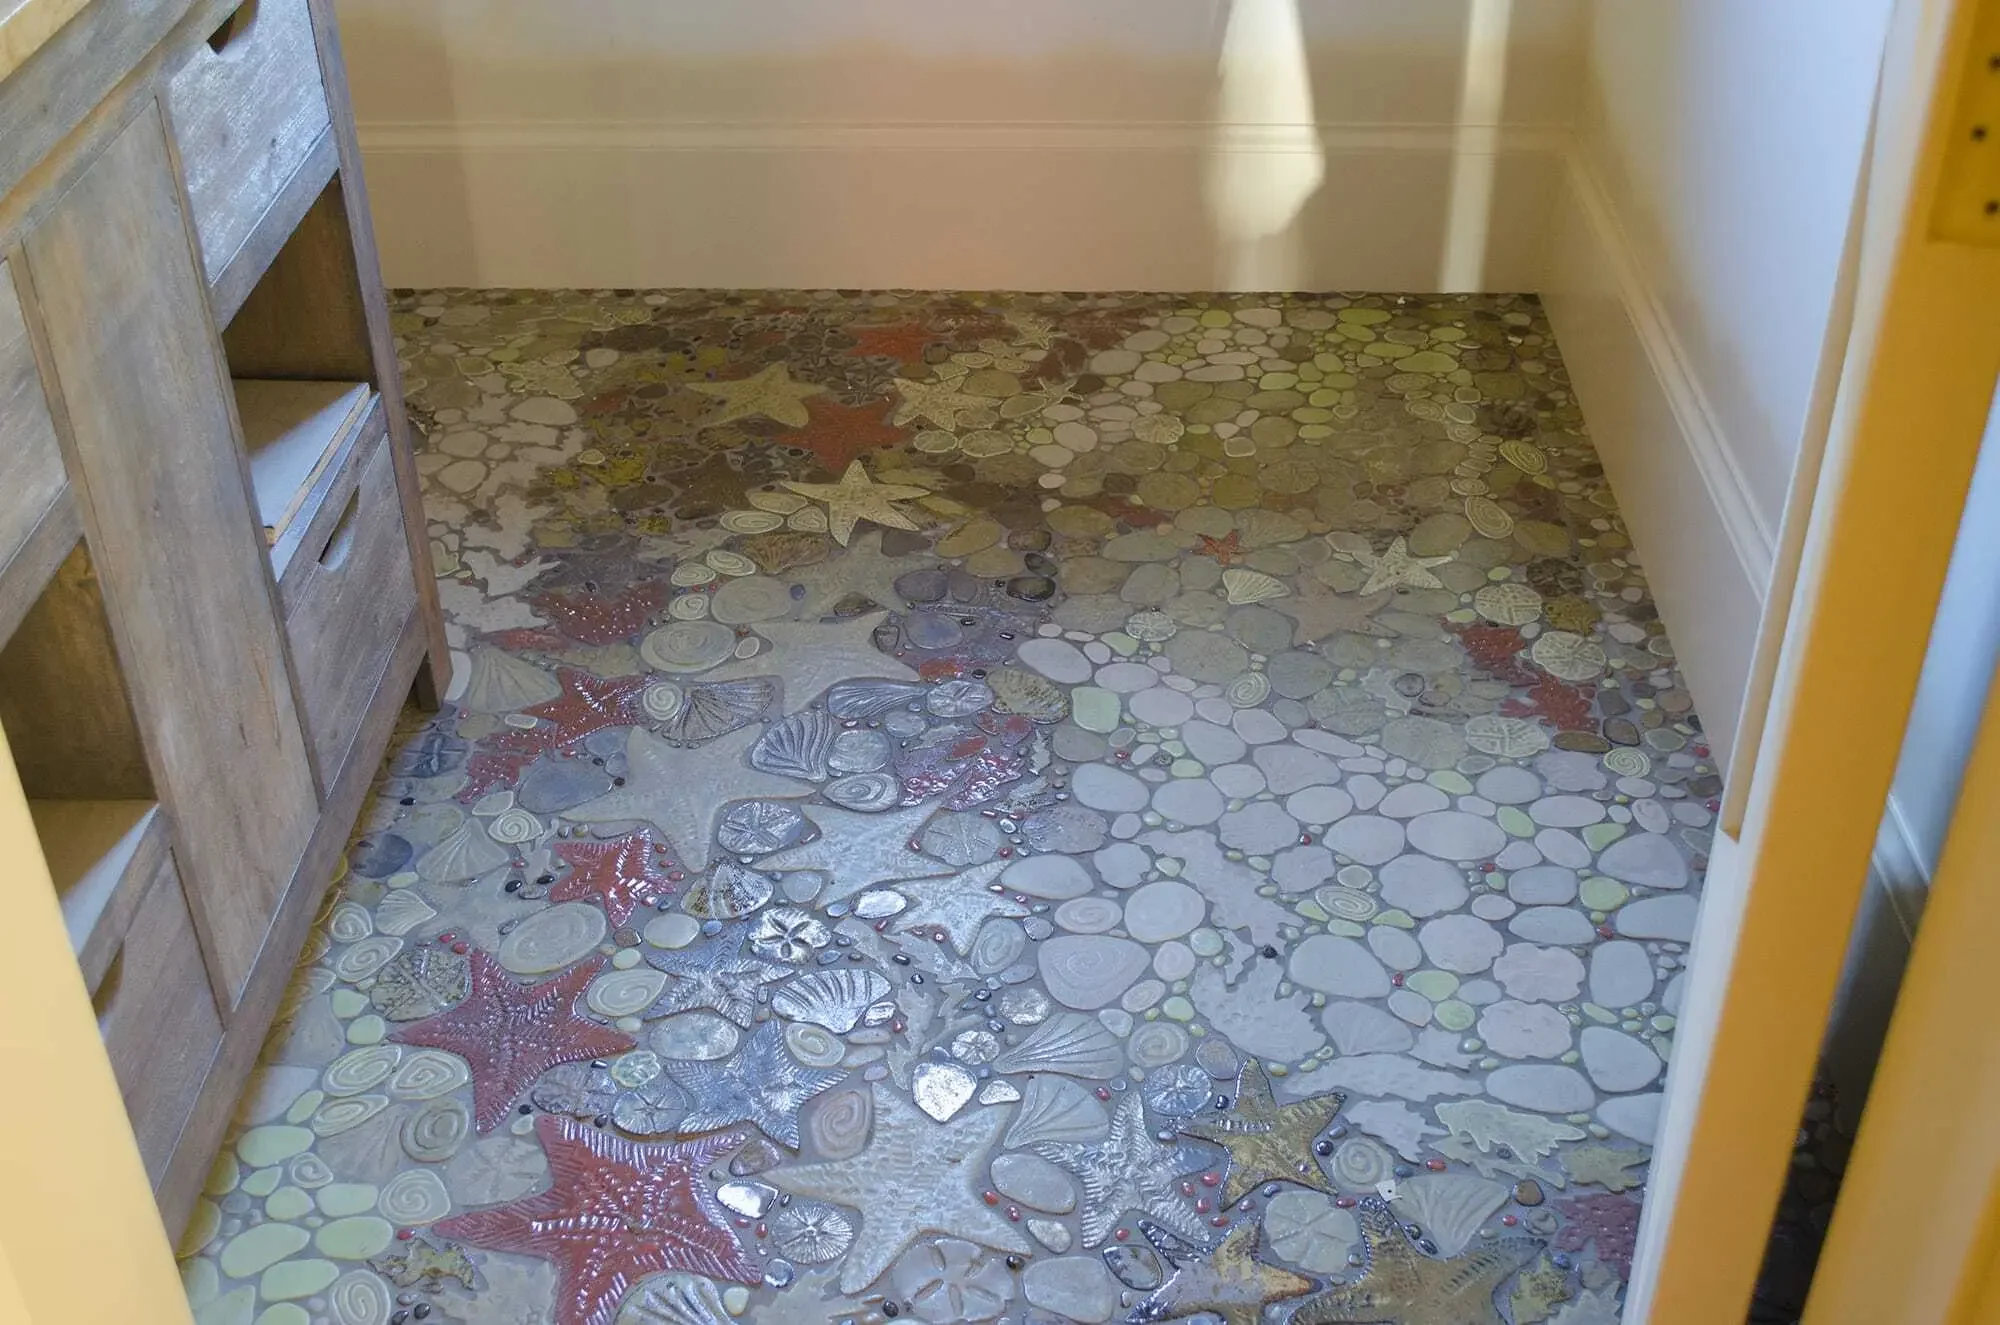
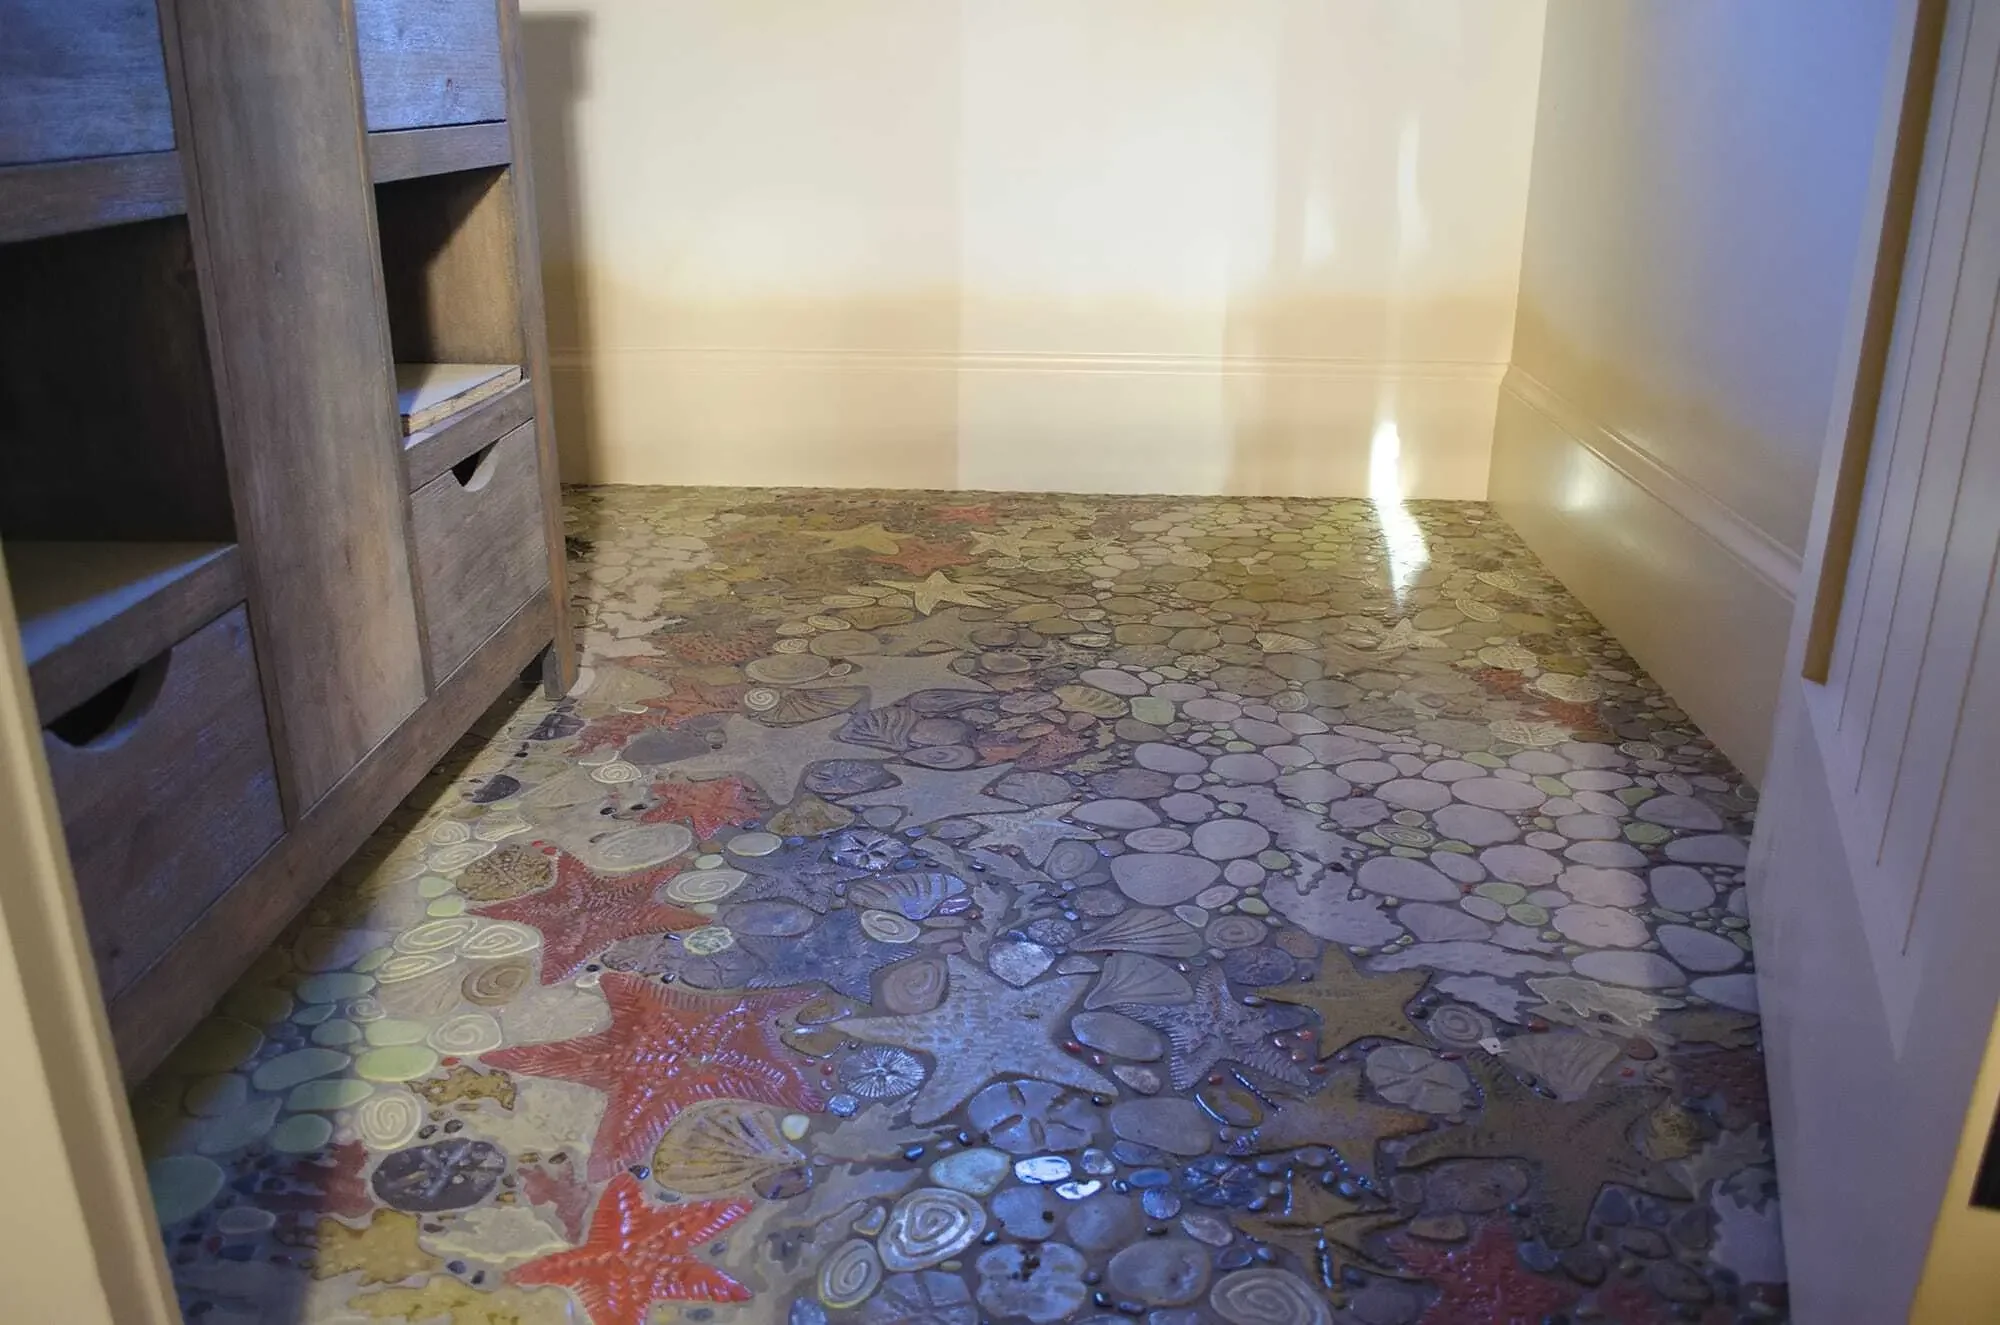
With a floor this beautiful, I think the customers and their guests are going to look for excuses to use the bathroom!
Do you have a tile project that you’re interested in starting for your Seattle or Tacoma home? We’d love to help! Give us a call, or…