Most of the IKEA kitchens we install, we handle start to finish. This West Seattle project was different. The homeowner picked out a set of AXSTAD green kitchen cabinets and started the install on his own, and by the time he called us, he’d already done most of the heavy lifting himself. He’d done it well, too. He just ran out of steam before the finish line. We’ve all been there.
He Had Already Done the Hard Part
This wasn’t a homeowner who was in over his head. Before we ever showed up, he’d taken out the wall between the kitchen and the dining room, set a new beam to carry the load, handled a good chunk of the electrical, hung and finished drywall, and had the floors patched and refinished. That would be hard to pull off for a DIYer, but he took the time to get advice from some pros, watched some YouTube videos, and pulled it off without a hitch.
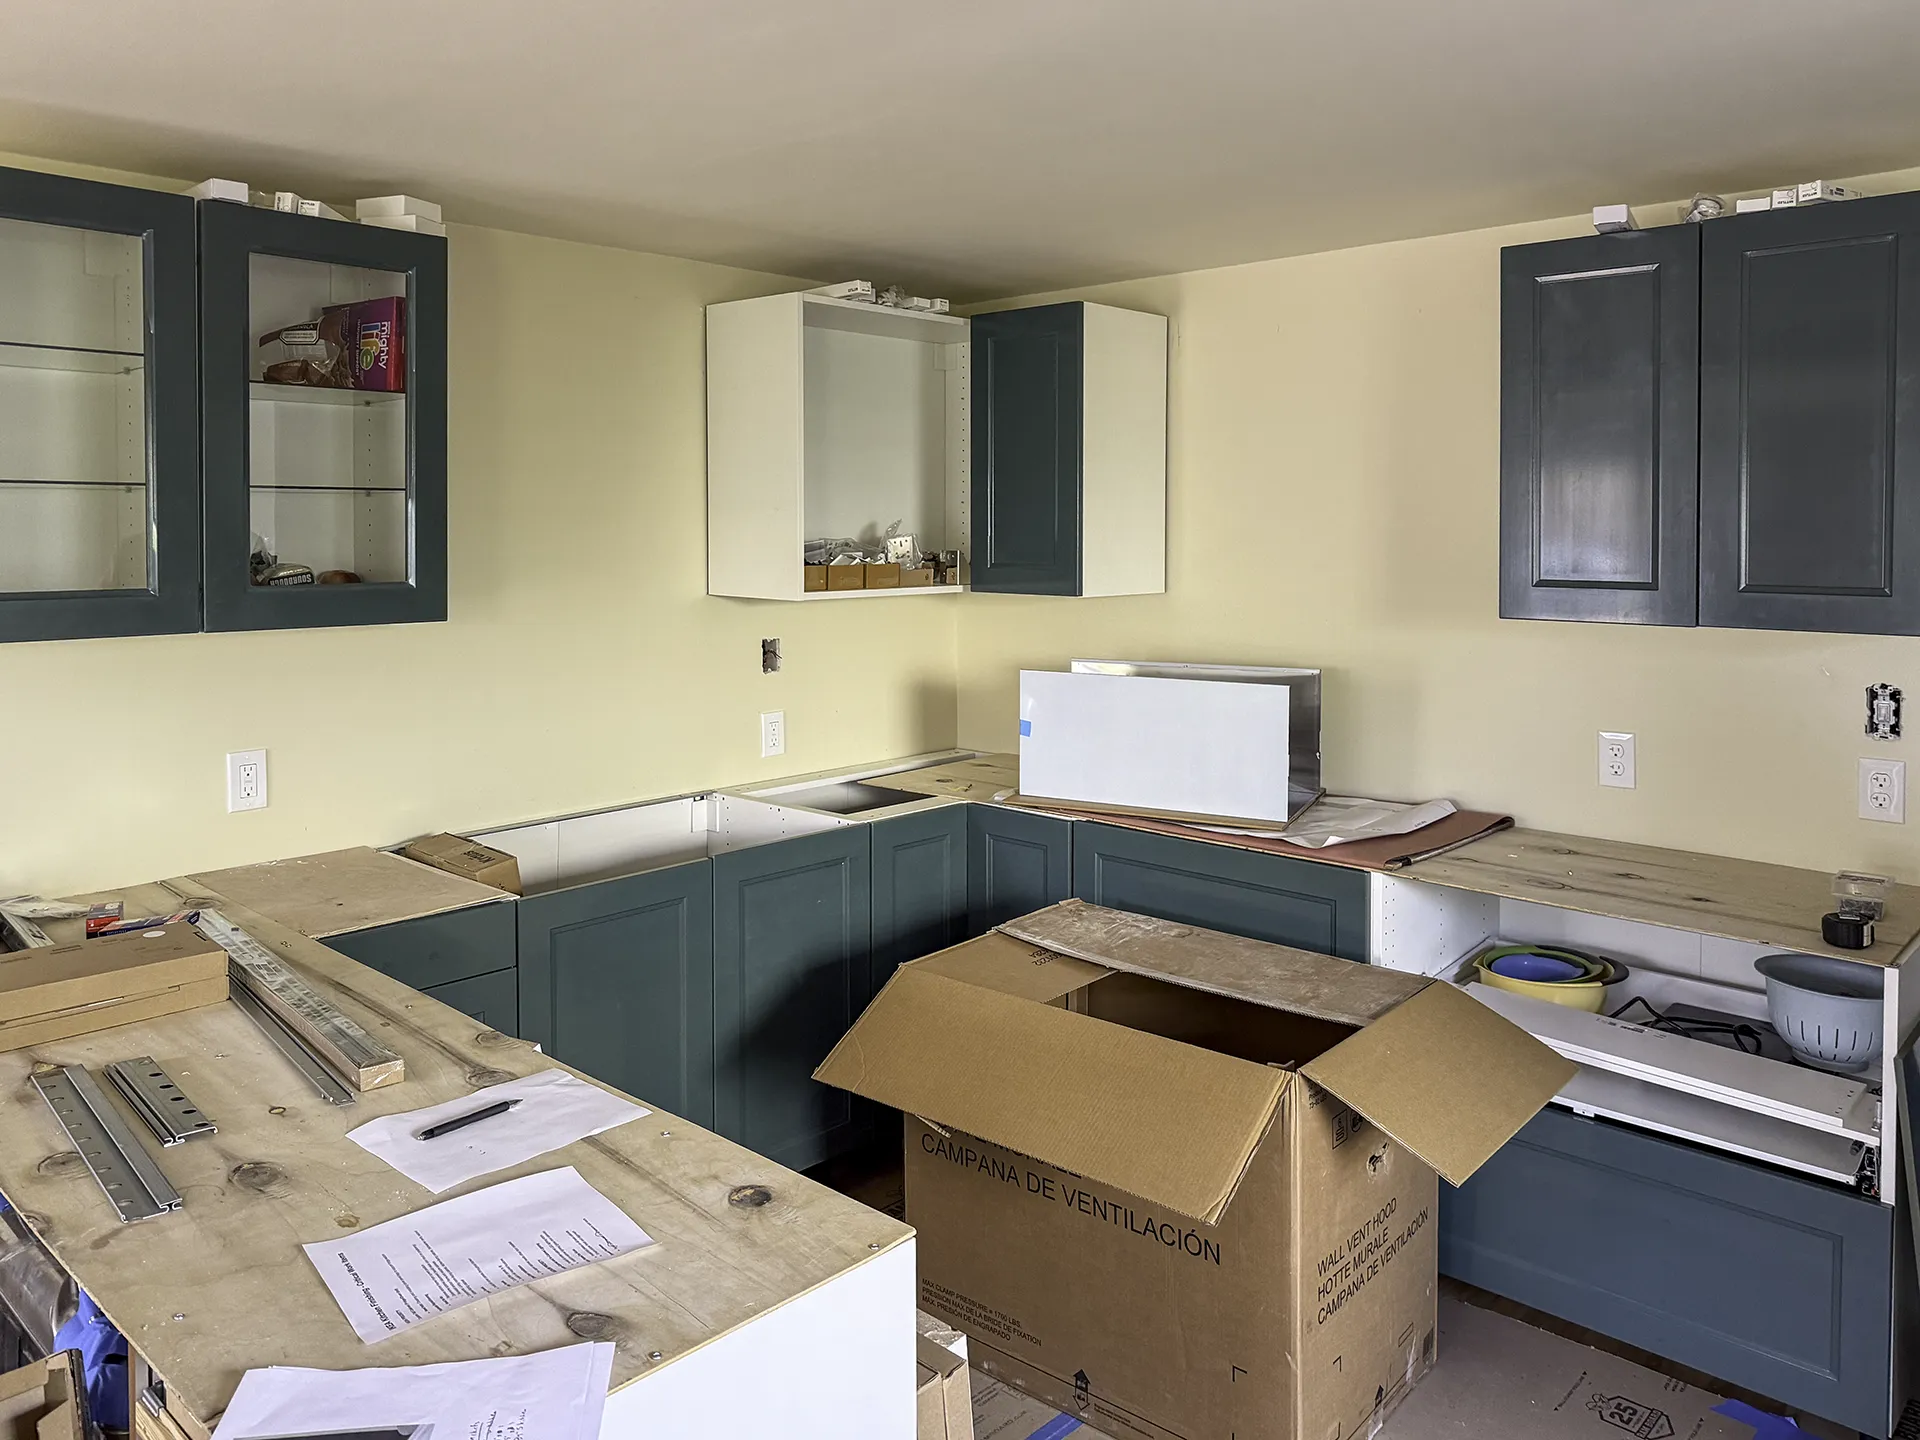
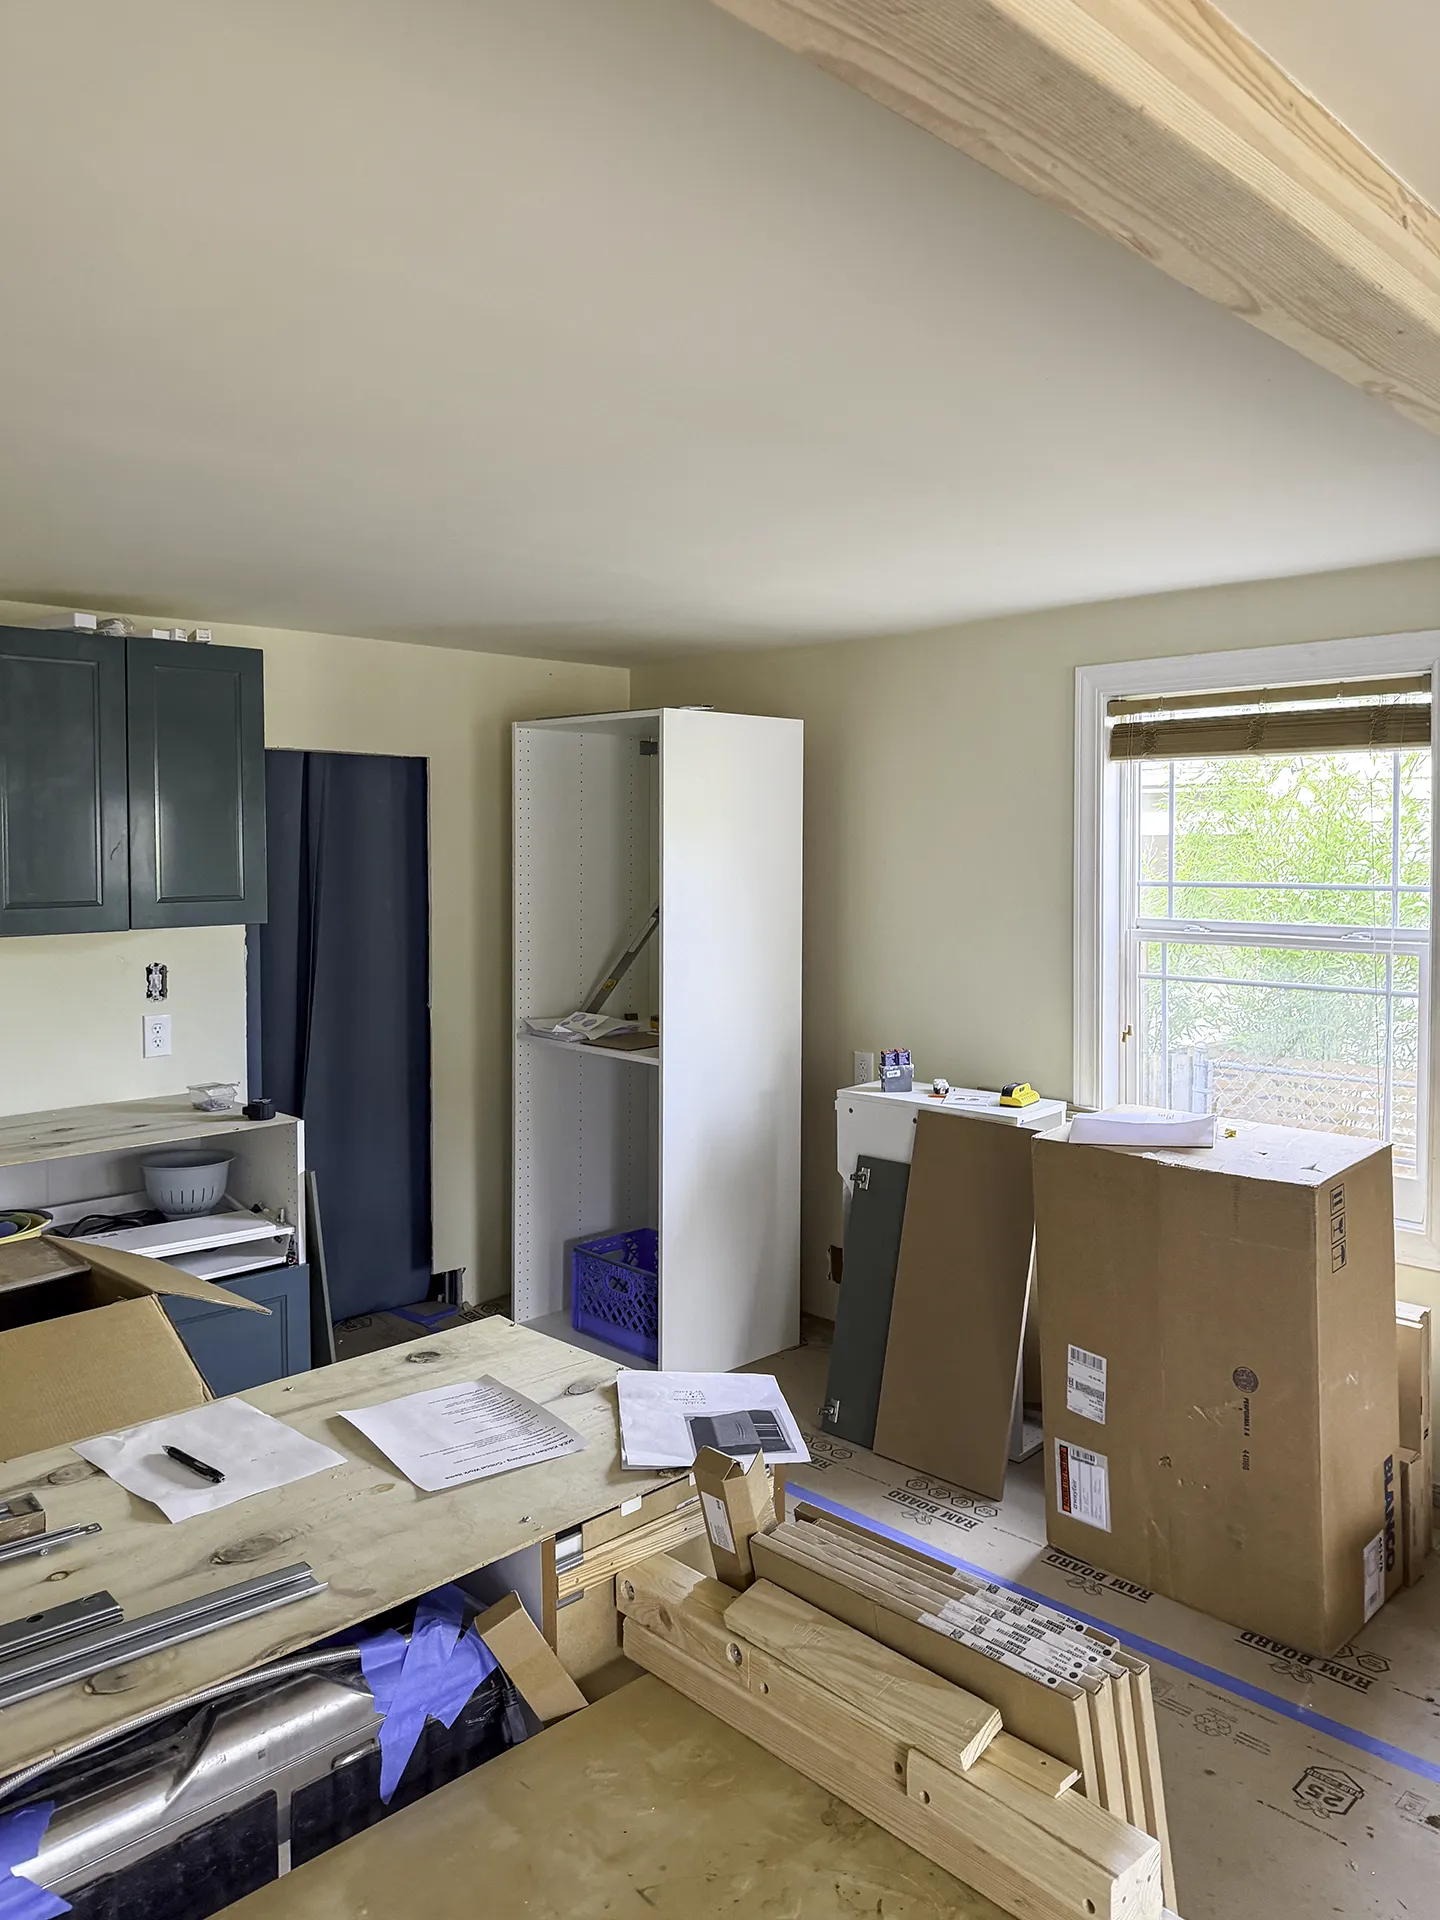
By the time he got to the cabinets, though, he’d started to run out of steam. If you’ve ever assembled IKEA furniture, multiply that by an entire kitchen and you start to understand. Sektion cabinet boxes, Maximera drawers, doors, panels, hinges, and bins of hardware spread across every flat surface in the room. The before photos tell the story: a kitchen full of potential, buried under cardboard and parts. He’d done a great job up to this point, but he just needed someone with a little more IKEA know-how to carry him over the finish line.
A Quick Word on IKEA Hardware
If I had one piece of advice to give to someone who’s about to start their first IKEA kitchen, it would be this:
When you open an IKEA box, whether it’s a Maximera drawer or a Sektion cabinet, keep all the hardware together with that box. Here’s why. When you assemble the cabinet or drawer, you use some of the hardware right away just to build the box. But there’s another set of pieces you’ll need later, for attaching a drawer front or securing the cabinet to the wall. Those leftover pieces are very specialized, very necessary, and not easy to replace if they go missing.
What I see people do constantly, including my own employees when they’re starting out, is assemble everything and then dump all the extra hardware together into a can or box. Now it’s all mixed together, and you’re sifting through a pile every time you need one screw. Worse, those small specialized pieces get shuffled around and lost, and by the time you need them they’re gone. On top of that, it can be tricky to even know what hardware goes with what part, since the larger Maximera drawers require a different set of hardware from the medium and small drawers.
So yeah, keep the extra hardware with the box or drawer it belongs to. You’ll thank me later.
Fixing the Peninsula Corner
The homeowner had done solid work, but a couple of things needed to be redone before we could move forward. The big one was the peninsula.
He hadn’t installed any filler in the inside corner. Without it, the bank of drawers on the sink side would collide with the handles on the peninsula drawers every time you opened them. The standard fix is to leave about 3 inches of filler in an inside corner so drawers and doors clear each other. But if you have an appliance near that corner, a dishwasher or especially a range, you need even more room so doors and drawers can clear the appliance door and handle. We ended up having to completely reinstall that set of cabinets to give the corner proper spacing so everything opens freely.
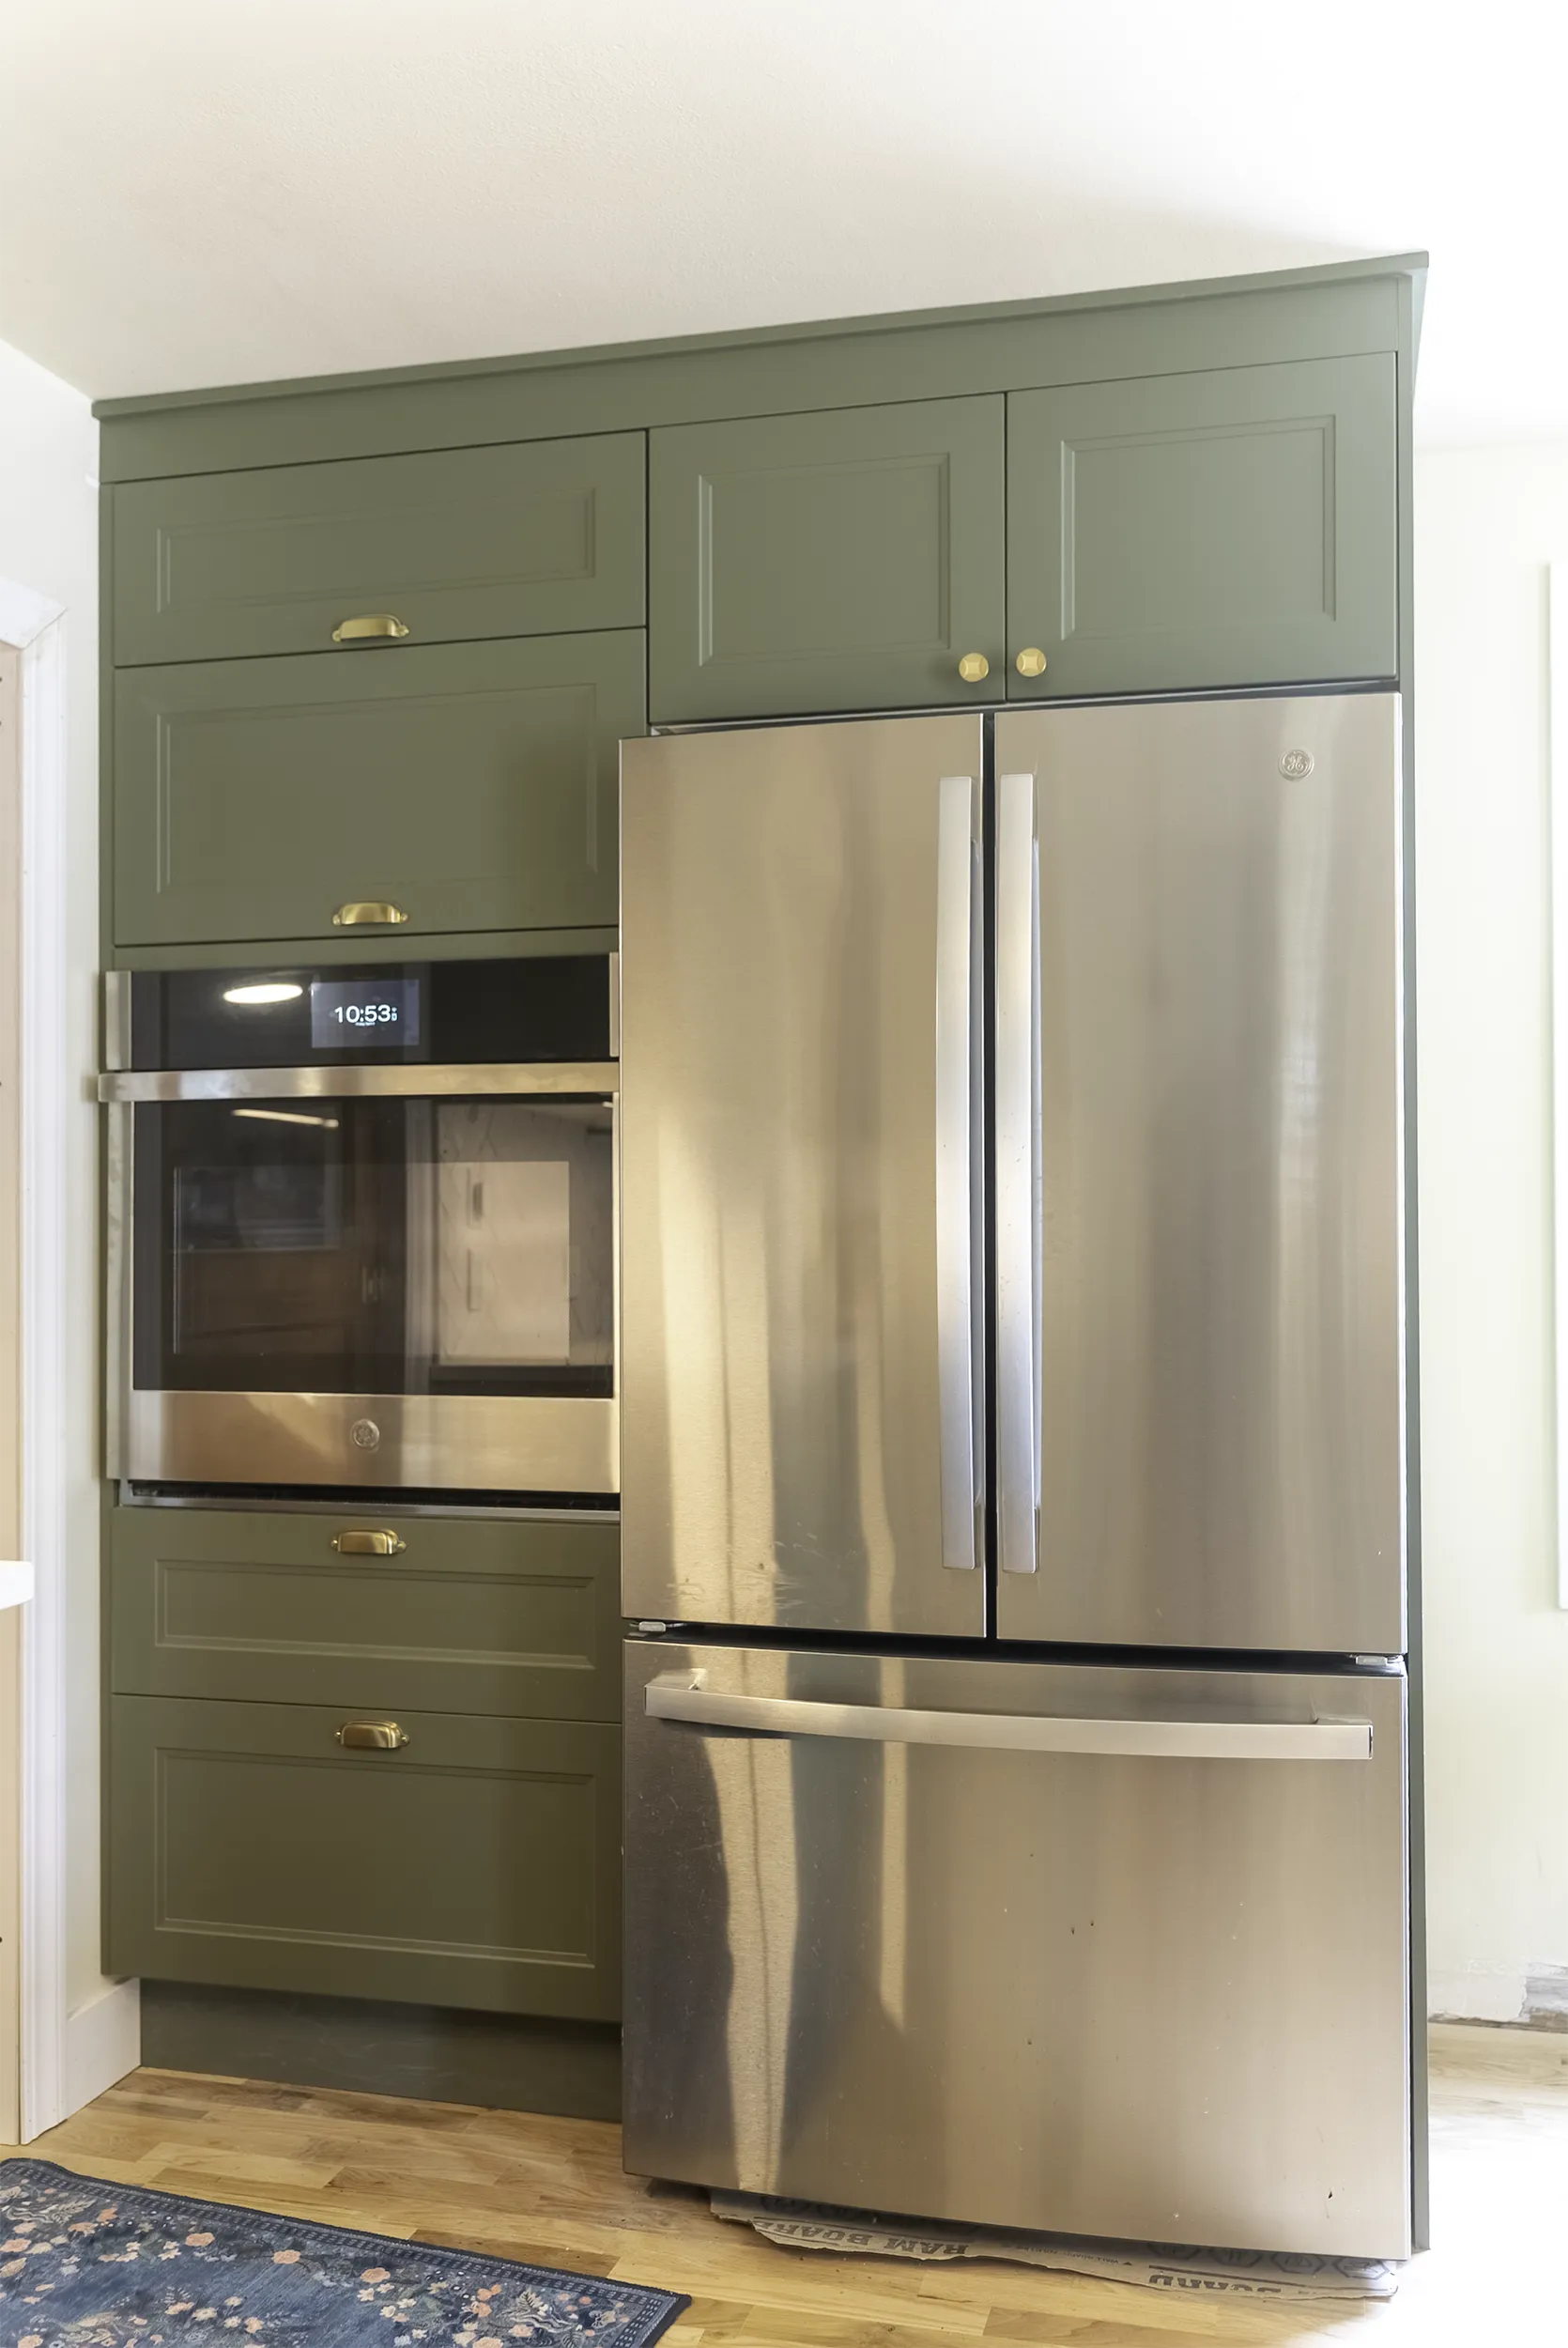
Closing the Gap to the Ceiling
The other thing we wanted to address was the space above the upper cabinets. IKEA upper cabinets come in two heights, 30 inches and 40 inches, and those sizes don’t always line up with the ceiling in some homes. That was the case here. We had 4 to 5 inches of open space above the cabinets.
We could’ve left it open, but that gap never does you any favors. It just becomes a shelf for dust and cooking grease that nobody wants to clean. So we closed it in.
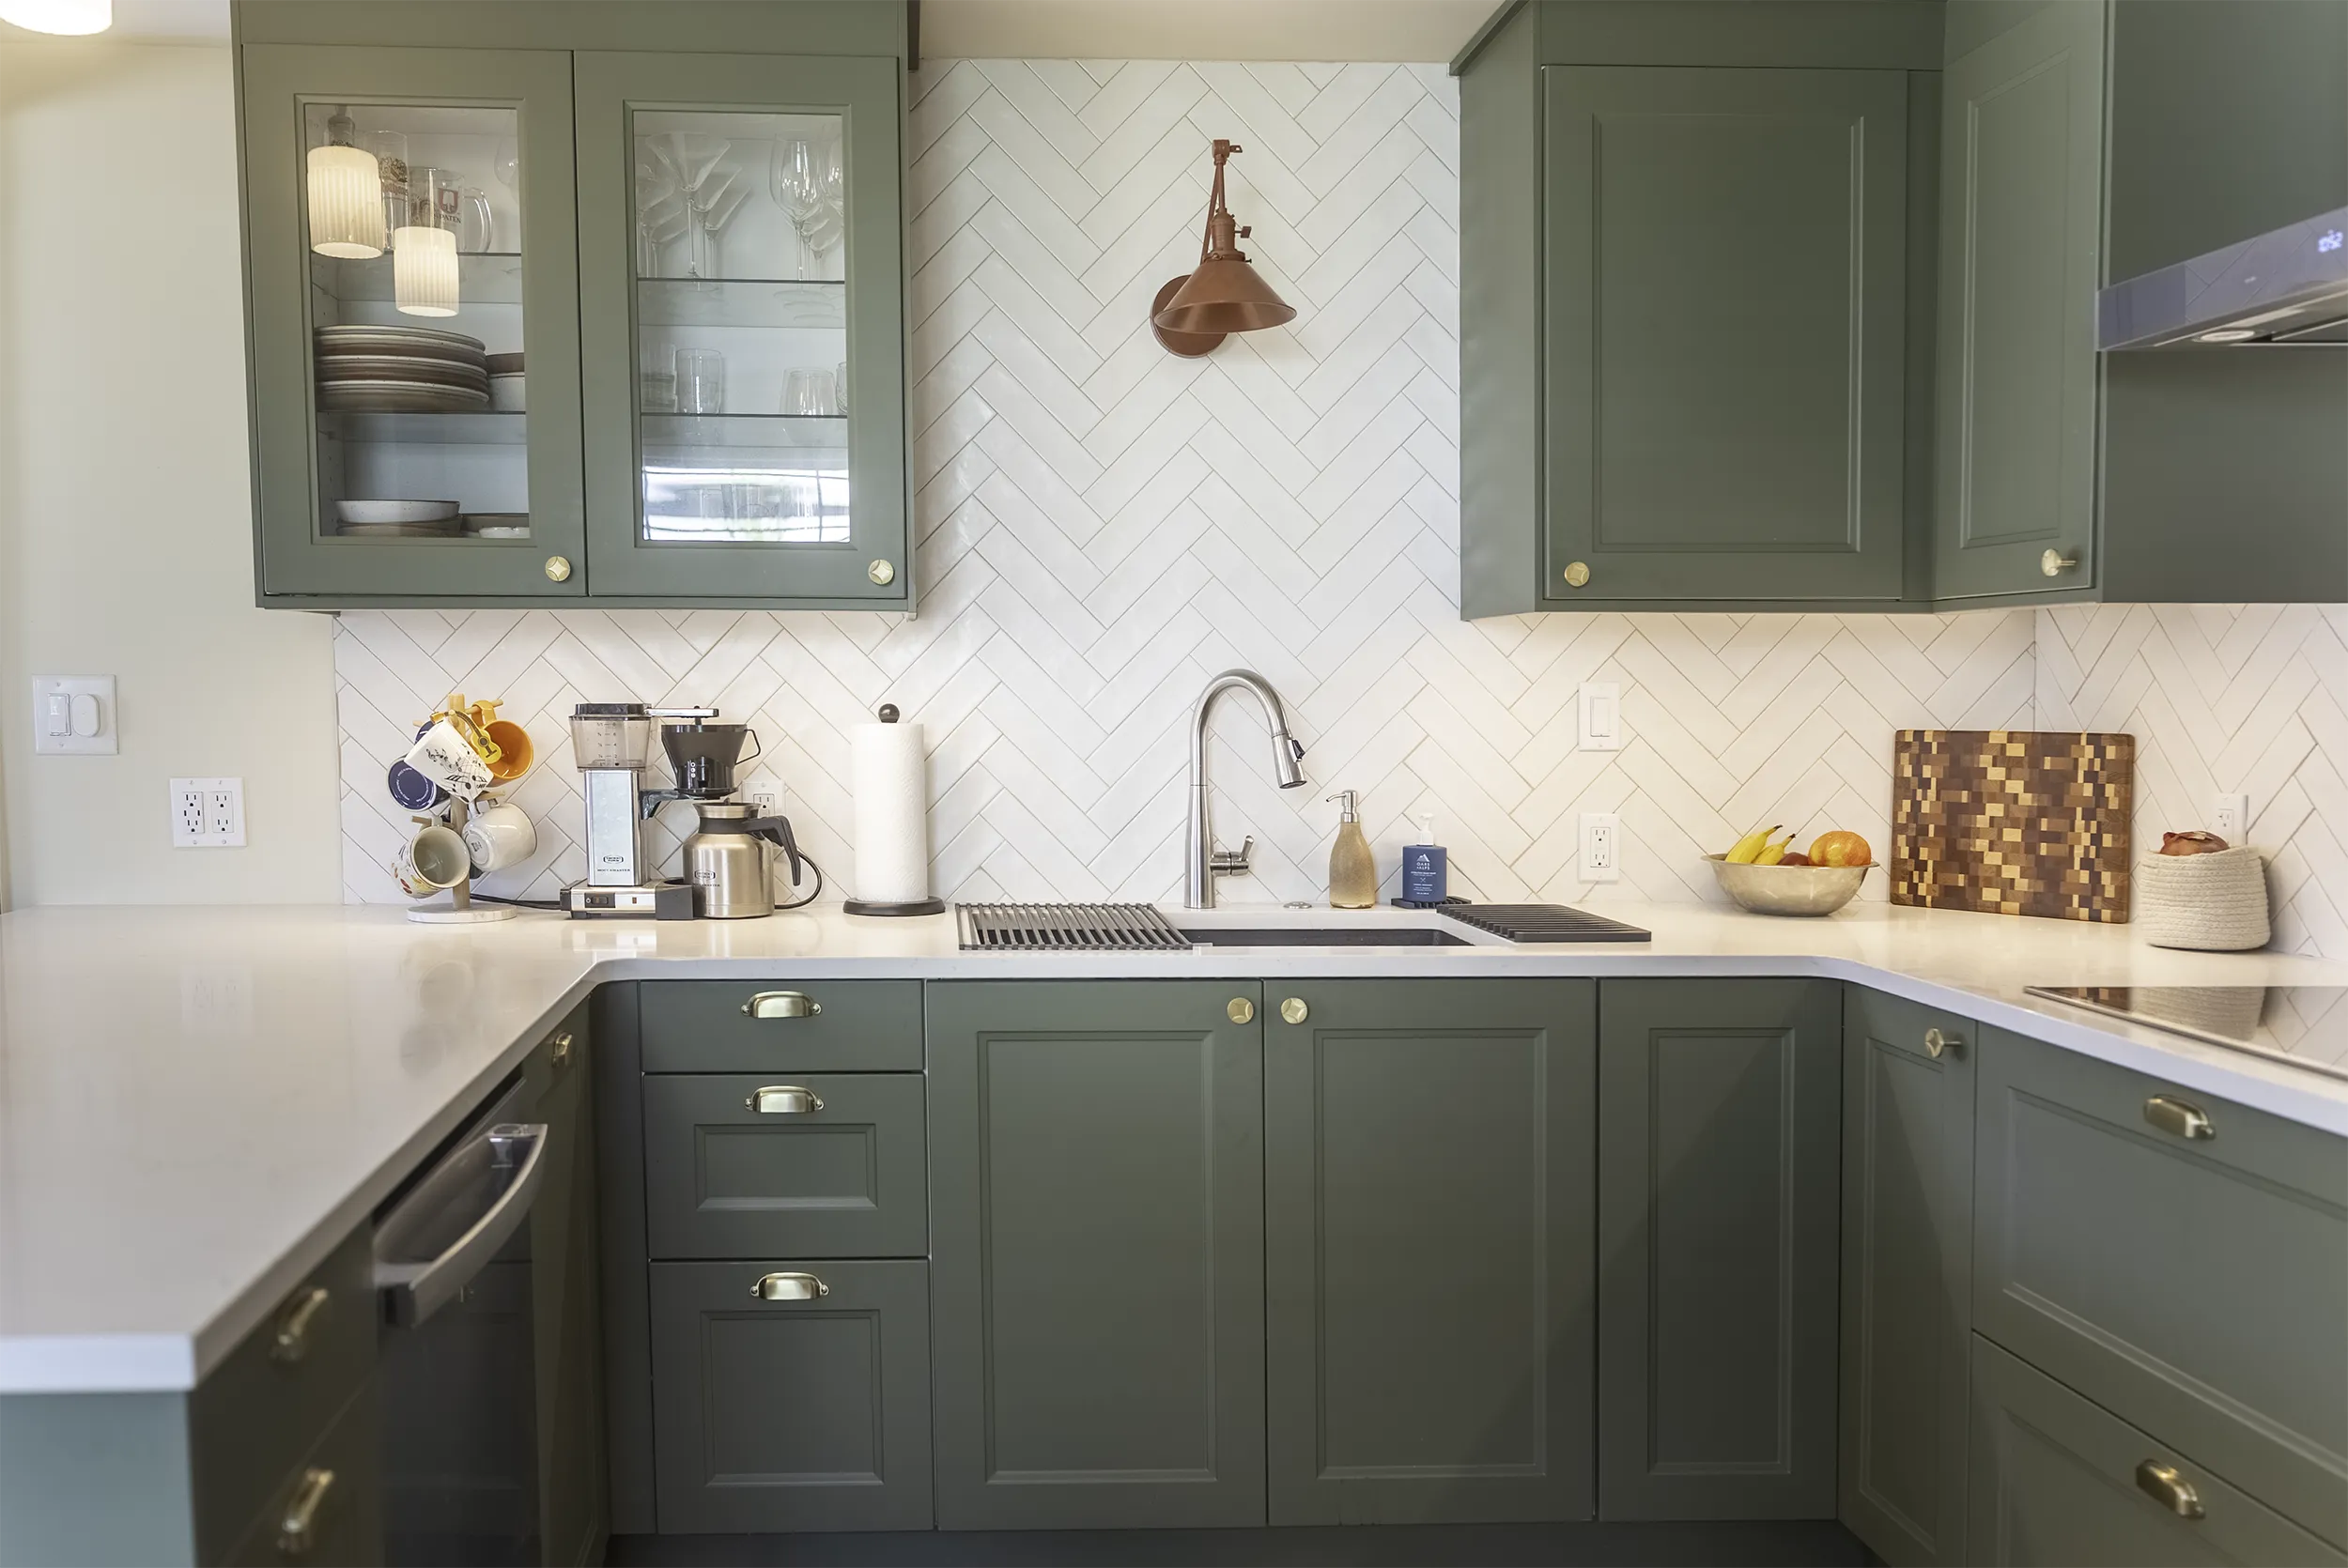
Our approach: instead of the standard 32-inch side cover panels that pair with a 30-inch cabinet, we used the taller 42-inch panels and ran them all the way to the ceiling. Then we used another cover panel to fill in across the front. To finish it off, we took IKEA deco strips, cut them down to just three-quarters of an inch, and tacked them along the ceiling with mitered corners. That gives you a clean, simplified crown molding that makes the cabinets look built-in instead of dropped in.
The Finishing Touches
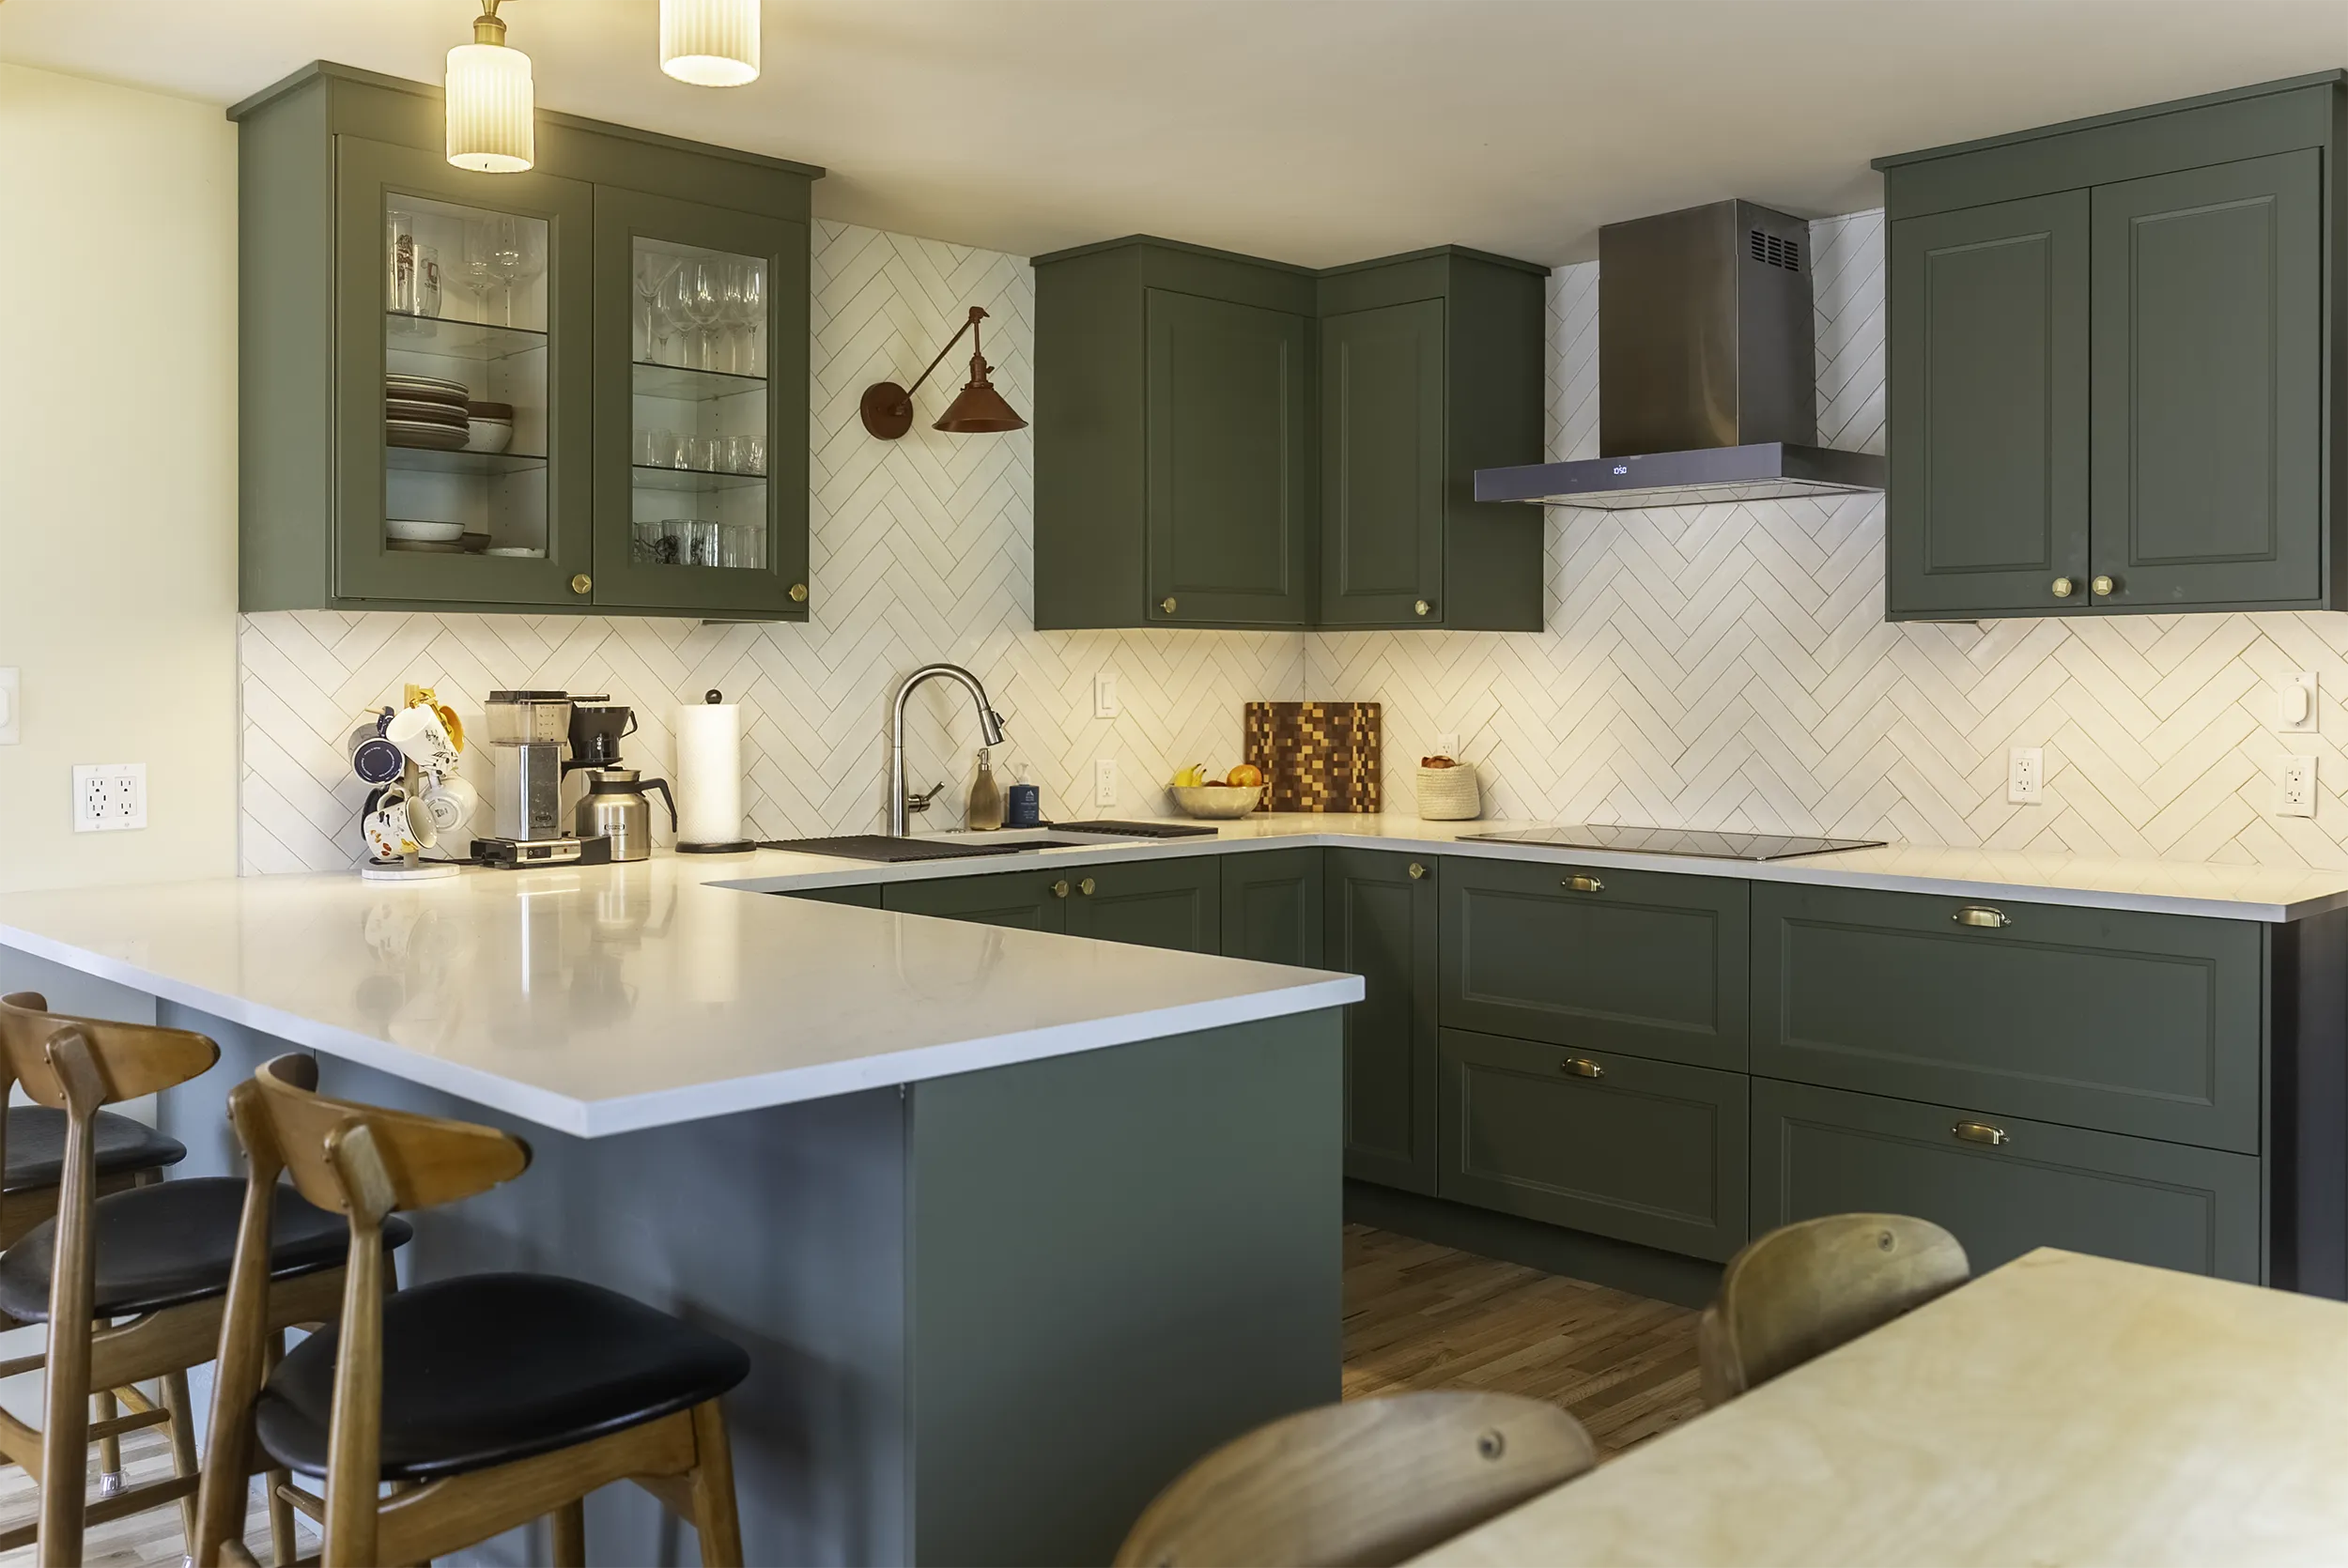
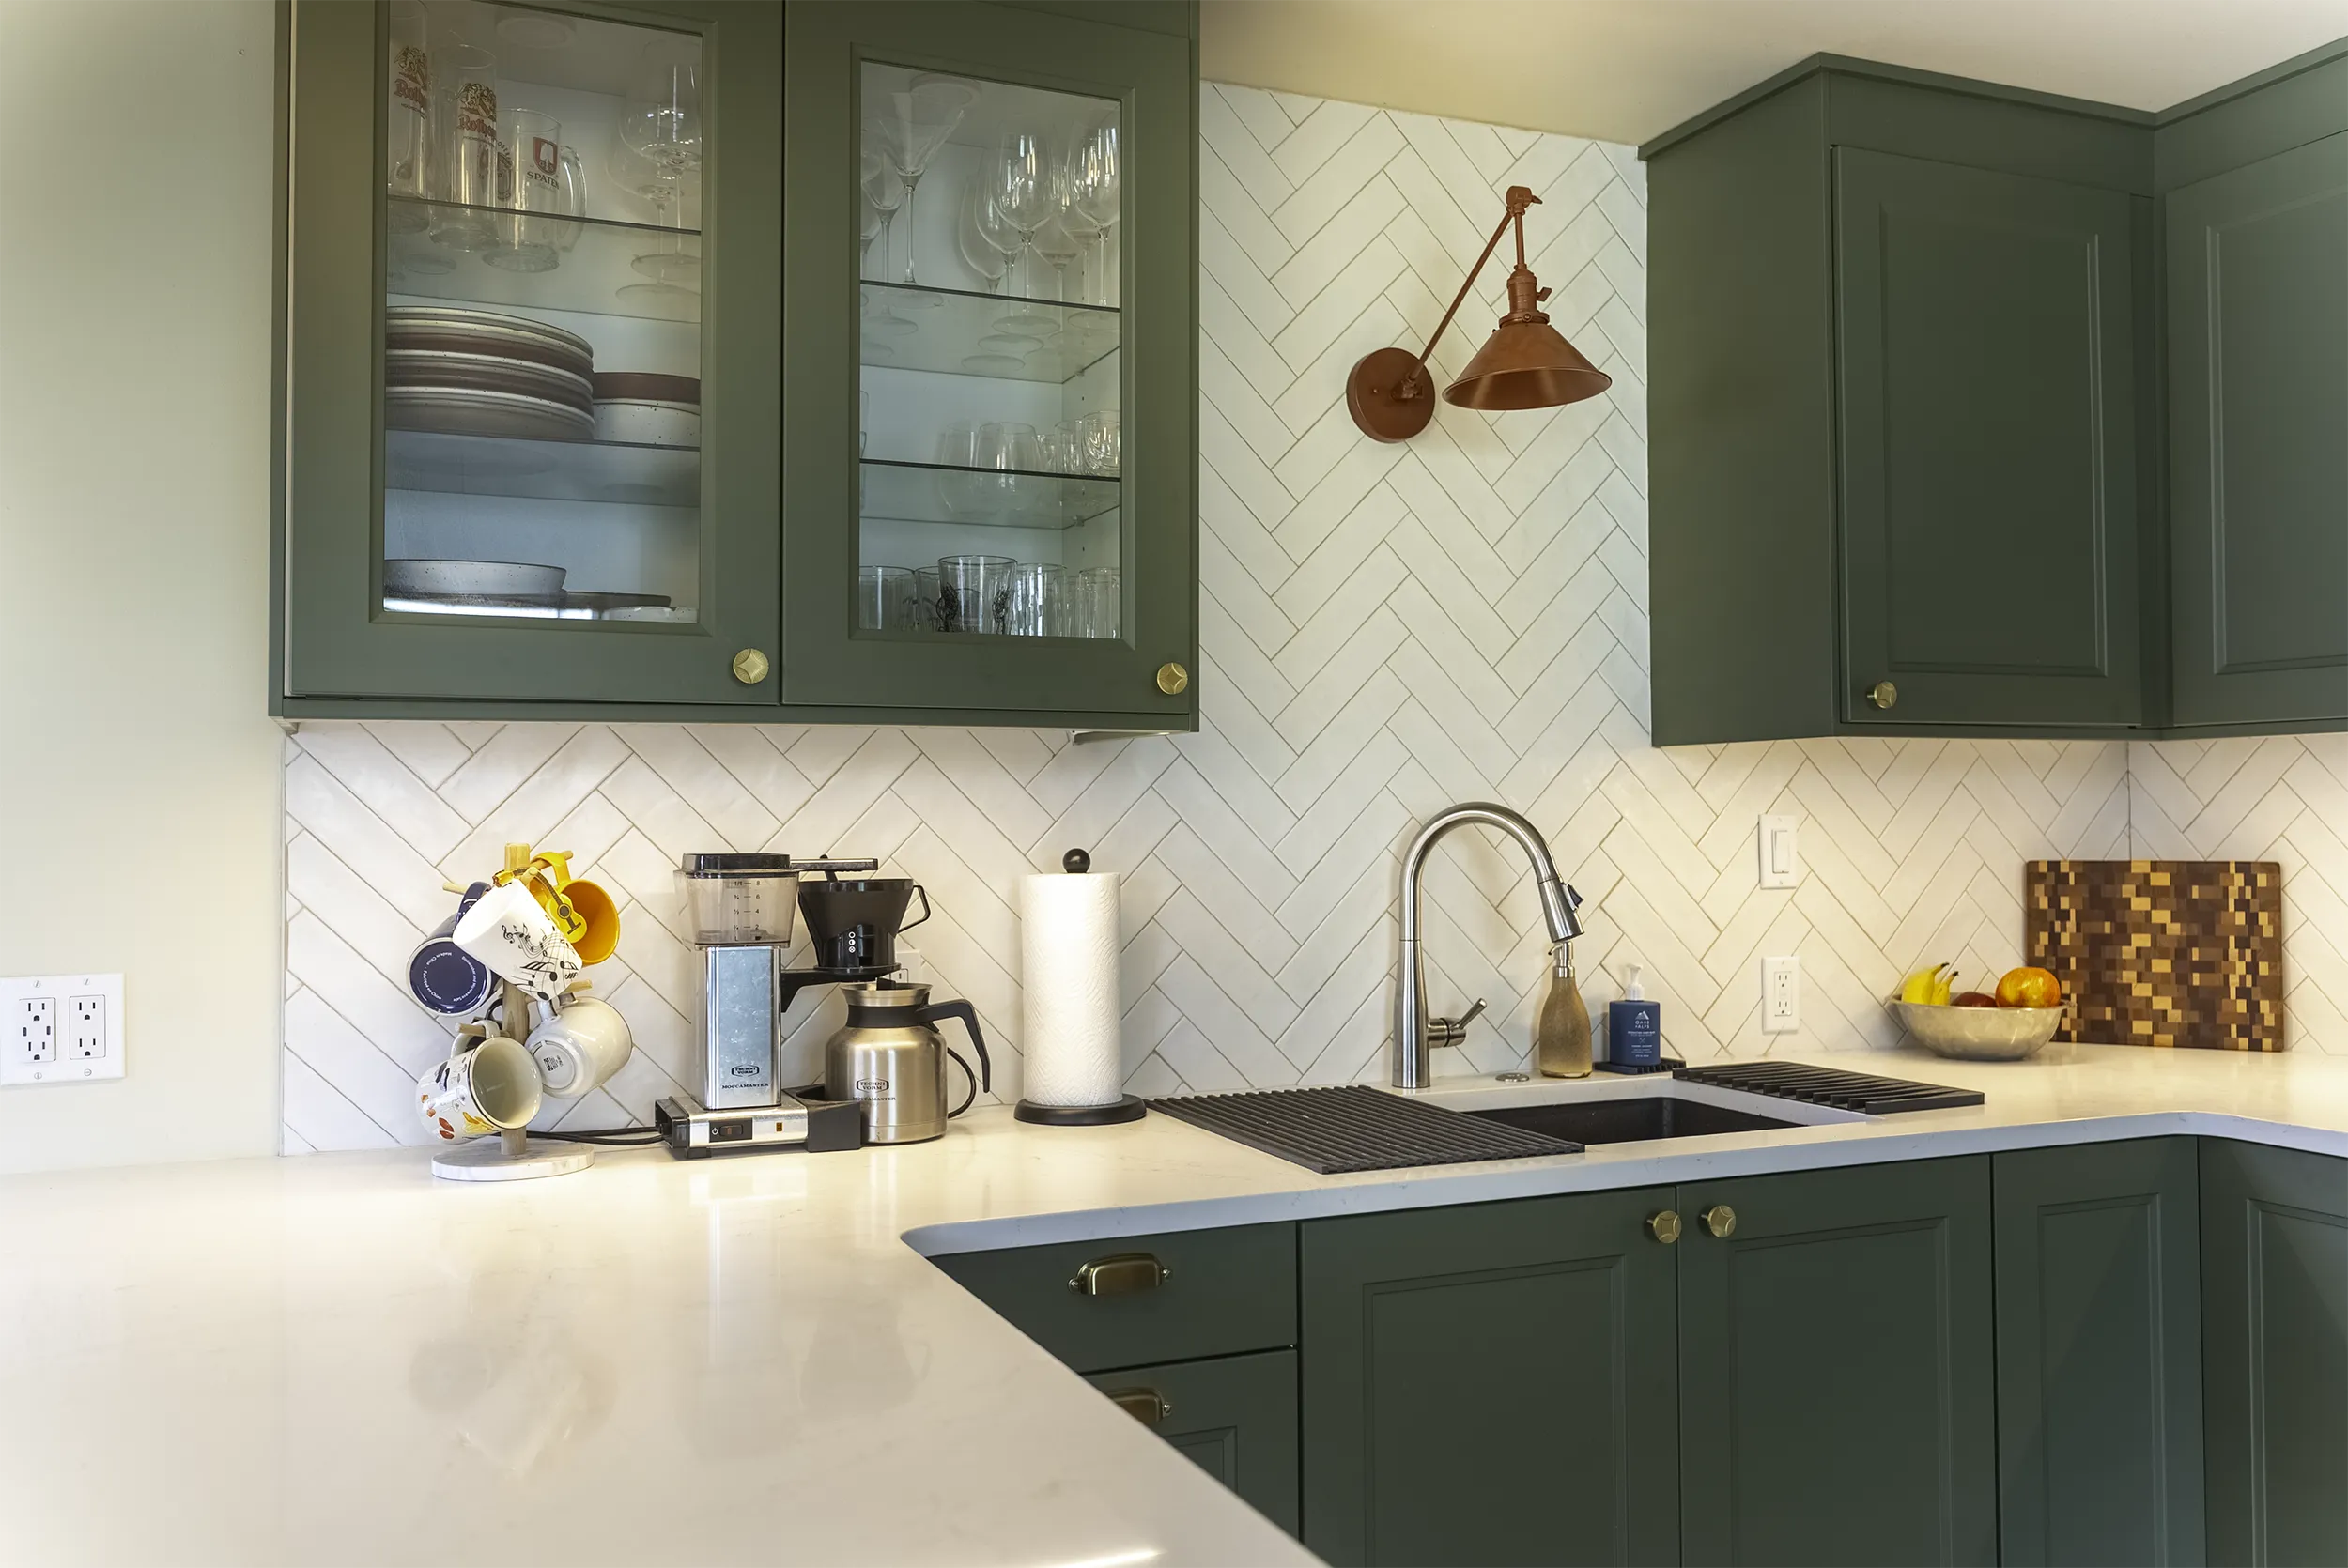
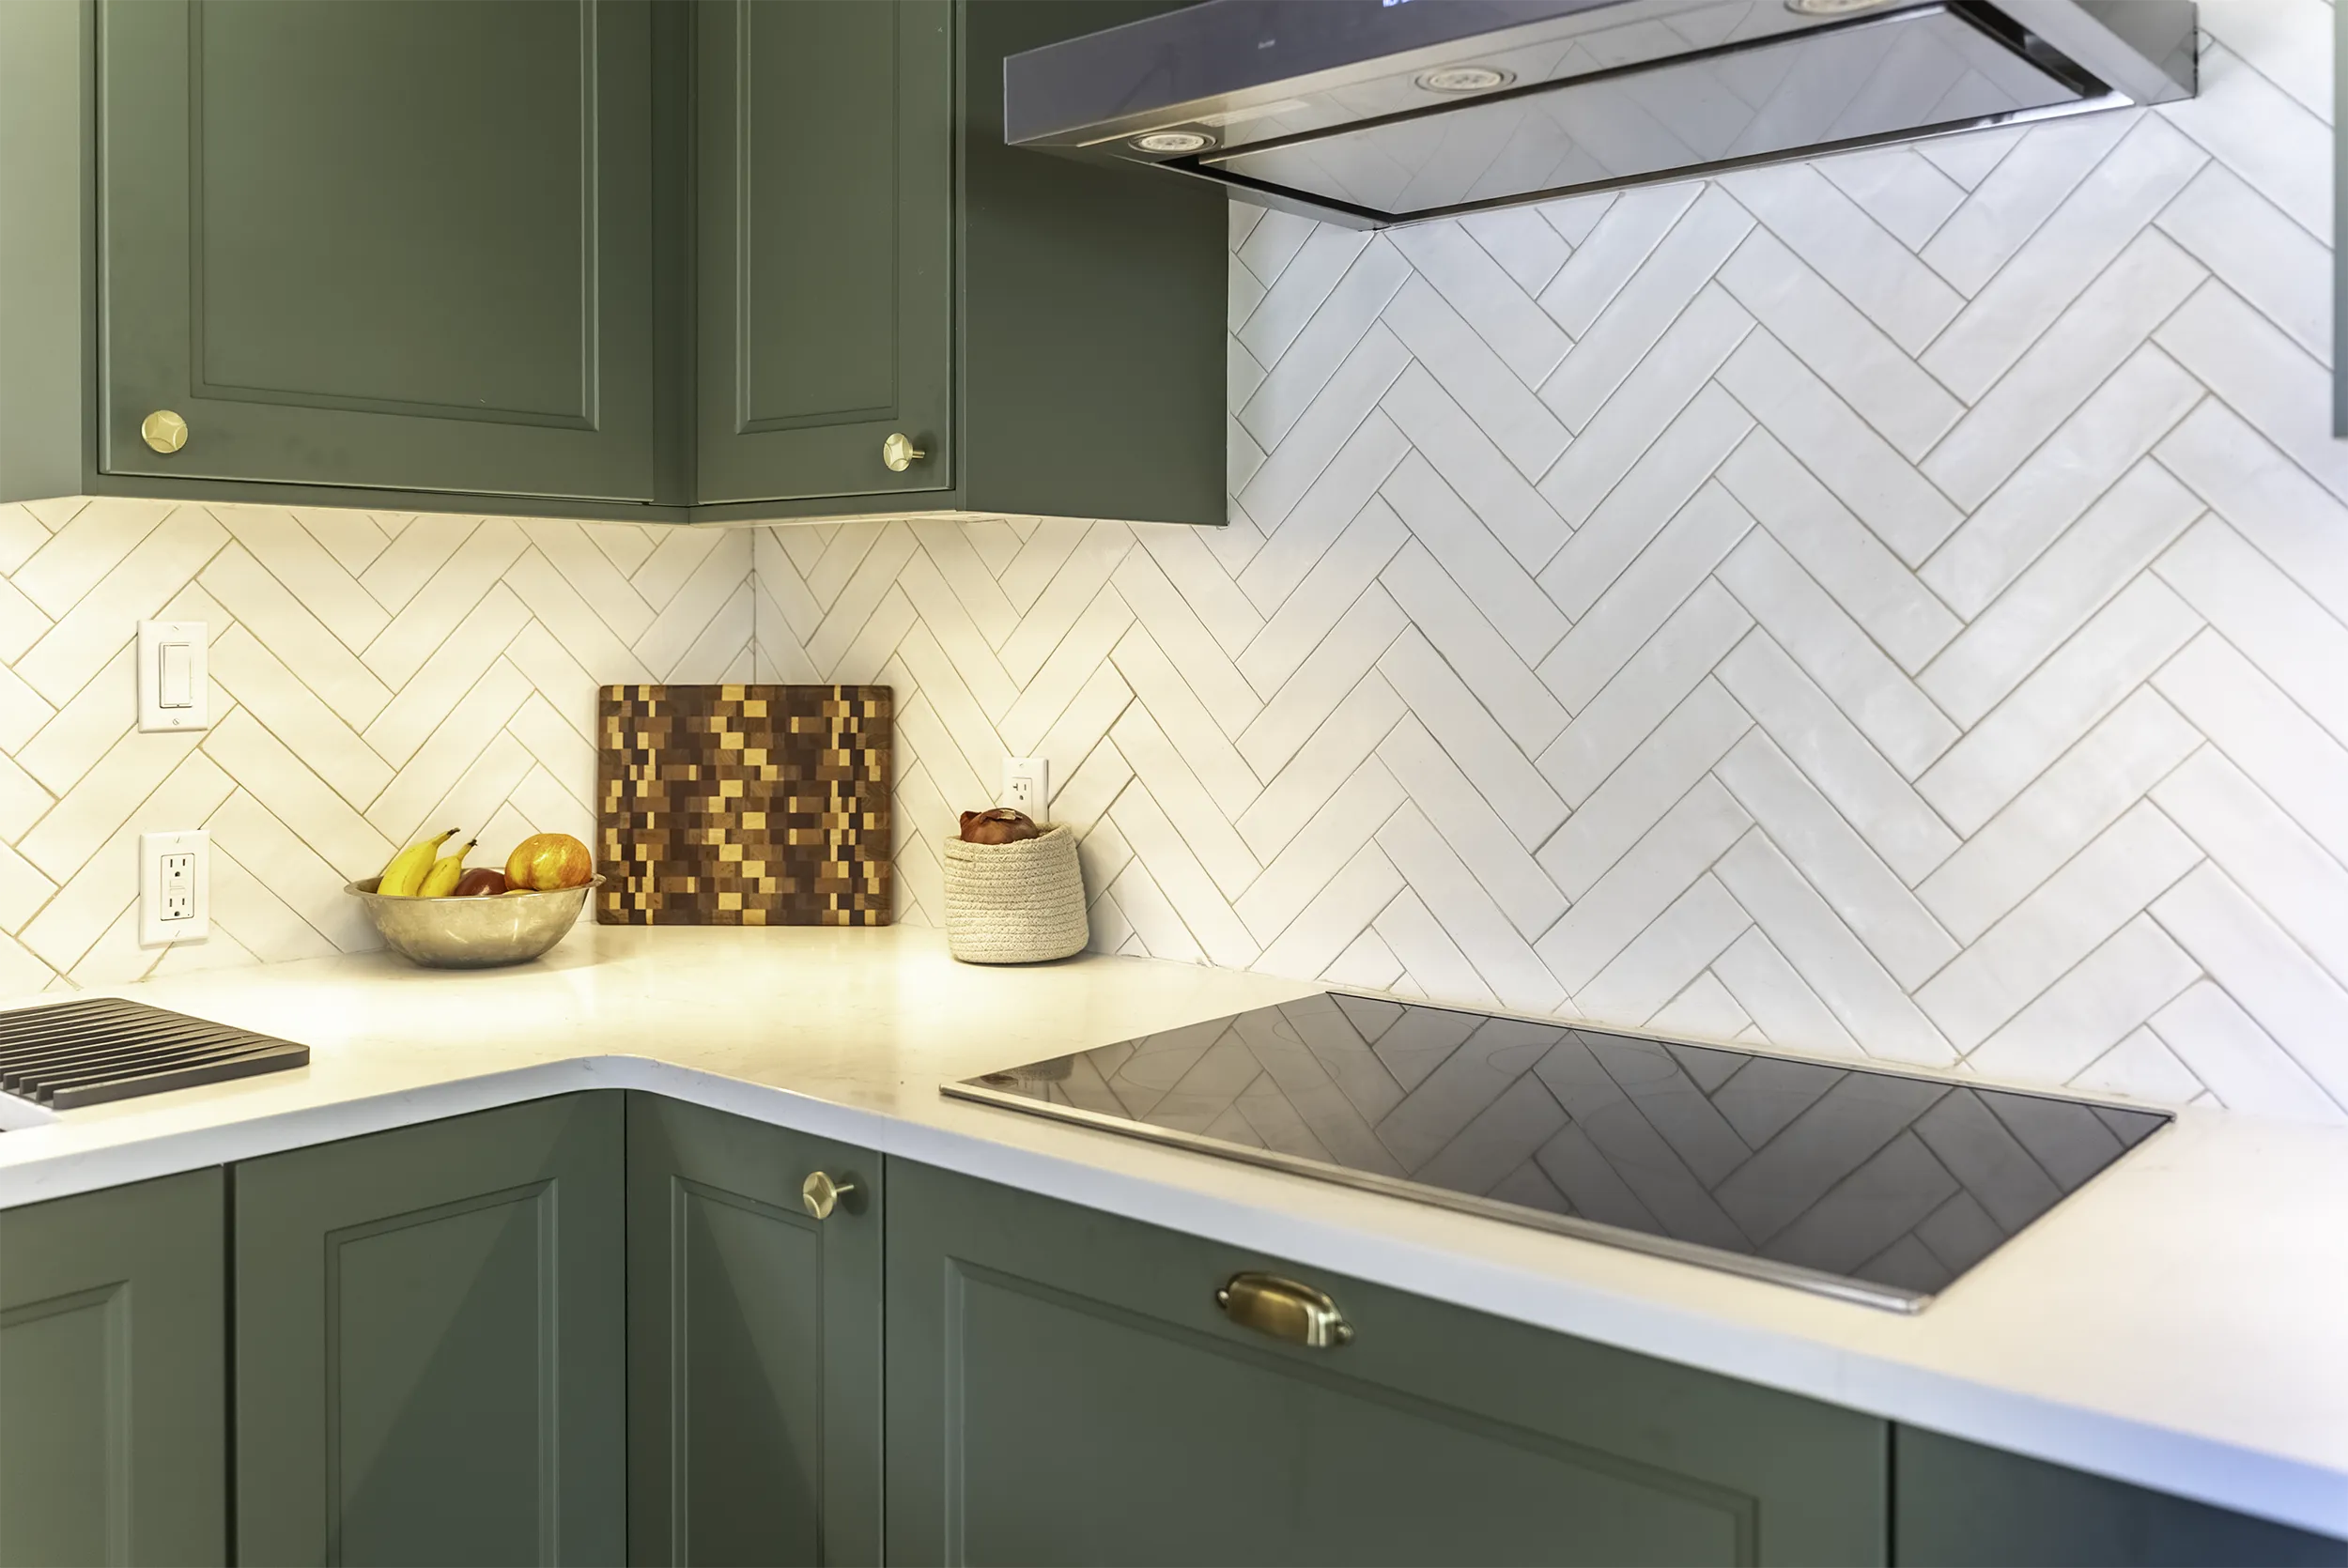
With the structural fixes done, the rest was craftsmanship. We went through the whole kitchen making sure every cabinet was level and square, then adjusted all the doors and drawers so the gaps were even and everything closed soft and true. Then came the hardware. The homeowner had picked brass pulls and knobs, and against the AXSTAD green fronts they look fantastic. That combination of warm brass and muted green is a big reason green kitchens are everywhere right now.
We also helped wrap up a few things beyond the cabinets: finishing the electrical, installing the interior and under-cabinet lighting, mounting the range hood with a brand-new vent run through the roof, and setting the built-in oven.
He Took It From There
Here’s the part I love. Once the kitchen started looking like a kitchen again, our homeowner got his second wind. He decided to tackle the herringbone tile backsplash himself, and I have to say, it looks fantastic. Crisp lines, tight joints, the kind of detail that makes a whole room.
That’s the best outcome we can ask for. We didn’t take the project away from him. We got him unstuck and handed it back.
Sometimes You Just Need a Little Help from an Expert to Finish Strong
IKEA kitchens are built to be DIY friendly, and for a lot of homeowners they’re a great way to get a high-end look on a real-world budget. But there’s a point in almost every project where a little professional help takes it from “I think this is right” to “OH! That’s how you’re supposed to do it!” Sometimes that means the whole install. Sometimes, like here, it’s just the last stretch. Either way, that’s what we’re here for.
If you have an IKEA kitchen that’s stalled out, or you just want it done right from the start, we’d love to help. Give us a call at (253) 448-9462 or reach out through our contact page.